Friday, August 29, 2014

Crescent Roll Topped Chicken Pot Pie

This chicken pot pie recipe is comfort food at it's best.  It's got everything you want, creamy sauce, buttery, crispy crust, tender chicken and sweet veggies.  Plus it's really easy and way better for you than those processed frozen ones.  Here's how you do it:

CRESCENT ROLL TOPPED CHICKEN POT PIE

2 boneless, skinless chicken breasts, cut into small cubes (or 2 cups leftover diced chicken)
1 1/2 cups frozen mixed vegetables, thawed
1 TBS oil
2 TBS butter
3 TBS all-purpose flour
Salt/pepper
1 cup chicken broth
1/2 cup whole milk
1 tube crescent rolls

Preheat oven to 375 degrees.  You will need an oven-proof skillet (cast iron is perfect for this!)

Season the chicken with salt and pepper.  Then, saute the chicken in 1 TBS oil over medium-high heat until cooked through.  (If you use leftover chicken, just warm it up in oil in the skillet). Add the thawed vegetables (an easy way to thaw them is to put them in a colander and run warm water over them.  Drain well!) to the skillet.  Add butter and stir to melt.  Sprinkle in the flour and stir.  Let cook for a few minutes, stirring.  Then add the chicken broth and milk.  Stir well and bring to a boil.  Then reduce heat and let simmer until thickened.  It just takes a few minutes.  Season to taste with salt and pepper.


Turn off the heat.  Open the tube of crescent rolls and separate into triangles.  Lay the triangles on top of the chicken mixture with the points in the center.  Like this:


Continue placing the triangles until you form a crust, completely covering the filling.


Bake at 375 degrees for 15 minutes or until the crust is golden brown.  Let it sit for 5-10 minutes before cutting.  It needs to cool a bit to firm up.


The triangles make nice guidelines for cutting, built in portioning!  This pot pie has a flaky, buttery crust and a creamy, delicious filling.  It's a great way to get some veggies into those picky eaters.  Plus, it's so easy you can make it any night of the week!  You definetely want to give this one a try.


Tuesday, August 26, 2014

Roasted Vegetable Grilled Cheese Sandwich

I love to roast vegetables!  Roasting brings out the natural sweetness in the veggies and gives them a whole new taste.  Plus it's easy!  I tend to make more than we can eat at suppertime (probably because my son "pretends" to eat his veggies tsk tsk tsk).  But, the left overs make a mean sandwich for lunch the next day.

First, this is how I roast the vegetables:

You can roast any vegetable you like.  Some of my favorites are broccoli, carrots, onions, zucchini, tomatoes and peppers.  All you do is cut the vegetables into similar size pieces (clean and dry them first), lay them on a cookie sheet, drizzle with a little olive oil, then sprinkle with salt and pepper.  Using clean hands, toss them around to evenly distribute the oil, salt and pepper.  Put them into a hot oven (preheated to 400 degrees) for about 15-20 minutes or until soft and a little charred on the ends.  Easy peasy! (get it, peas-y.  Sorry, bad vegetable pun)


Anyway, if you are gonna roast vegetables, roast a lot.  That way you will have left overs.  You can throw them into pasta or rice or soup or make this grilled cheese sandwich.

ROASTED VEGETABLE GRILLED CHEESE SANDWICH

2 slices good bread (I like to use 12 grain bread, but french bread is good too)
a little softened butter (to spread on the bread)
a good melting cheese (whole milk mozzarella, monterey jack, American)
leftover roasted vegetables, warmed up

Heat a skillet (I like cast iron, but a non-stick works, too) over medium-high heat.  Spread softened butter on one side of each slice of bread.  Place one slice of bread butter side down into hot skillet.  Lay cheese on top.


Then, spoon on some warm vegetables.


Lay more cheese on top of the veggies, then place the other slice of bread butter side up.


Let this toast up until the bottom is golden brown.  Be careful not to burn it!  Once toasted and golden, use a spatula to flip it over.


Press lightly with the spatula to help the cheese adhere.  The cheese is like the glue that holds the sandwich together (that's why I put it on both sides of the veggies).  Once the second side is toasted and golden, it's done!  Remove from the skillet to a cooling rack.  If you lay it on a plate and walk away, the bottom will get soggy.  Gross!  You want this nice and crispy.  Once it has cooled for just a few minutes, cut it in half, if desired.  I like to cut mine in half so I can see all the gooey goodness inside!


You can throw anything on this sandwich!  Add some pepperoni or salami for an antipasto sandwich.  Add deli ham or turkey.  Add some hummus or bean sprouts or avocado.  It's the perfect medium for left overs!  And quite possibly the perfect lunch.  

Wednesday, August 20, 2014

Italian Stuffed Chicken

I cook chicken a lot, especially boneless, skinless chicken breasts.  I am always looking for new ways to prepare it.  This idea came to me while I was shopping.  I saw some sun dried tomatoes and Parmesan cheese next to each other in my buggy and inspiration struck!  Stuff chicken breasts with a mixture of Italian flavors.  I tried it and it worked.  These were delicious!  Plus, they look impressive.  You could definitely make them for a dinner party.  No one needs to know how easy they are to make.

ITALIAN STUFFED CHICKEN

6 small or 4 large boneless, skinless chicken breasts
2 TBS minced sun dried tomatoes
1/2 cup Italian bread crumbs
1/4 cup grated Parmesan cheese
1 TBS chopped fresh parsley (never use dried parsley, yuck!)
2 TBS olive oil (plus more to drizzle on chicken)
Salt & pepper to taste

Preheat oven to 400 degrees.  Mix together the sun dried tomatoes, bread crumbs, Parmesan cheese, parsley and olive oil.  Salt and pepper to taste (easy on the salt, the cheese is very salty).  Set aside.


Cut a pocket in the side of each chicken breast:


Don't cut all the way through, just enough to form a pocket to stuff.

Spoon some stuffing into each pocket.


Use a toothpick to close the pocket.  This keeps the stuffing from coming out during baking.


Drizzle a little oil on the bottom of a 9x13 baking dish.  Place stuffed chicken into dish and brush a little olive oil onto each piece of chicken.


Sprinkle a little salt and pepper on each.


Bake for 30 minutes.


Be sure to remove the toothpicks before eating!


These are so flavorful!  They are literally stuffed with bold flavors.  But, they're really easy to make!  Give these a try.  Your friends and family will think you're a culinary wiz.  If only they knew...


Thursday, August 14, 2014

DIY Febreeze

I'm all for making my own cleaners.  I save time and lots of money!  If you have white vinegar, baking soda and lemons, you can clean your entire house.  But, today I want to tell you how to make your own Febreeze.

Febreeze is great for freshening your house.  It makes everything smell better, from curtains to mattresses to the dog bed.  I have an old dachshund, so I need to freshen the house daily, trust me.


But, Febreeze can get expensive.  So, I found a way to make it myself with things you probably already have.  Bonus, it costs pennies to make!

DIY FEBREEZE

3 cups warm water
2 TBS baking soda
4 TBS fabric softener (a good smelling one)

Mix everything together and stir well.  Pour into a spray bottle (I saved an empty Febreeze bottle and cleaned it out).  That's it!  Easy!


It works great!  I think it smelled even better than actual Febreeze.  I chose a fabric softener with a fragrance I love, Gain.  I have also made it with Snuggle, which was great, too.  I love when I can customize something to my mood.  The best part?  No more dog smell!  Give this a try.  I promise it will be worth the few minutes to save money and have a fresh smelling house!


Monday, August 11, 2014

Cannoli Dip

Cannoli are one of my favorite desserts.  Whenever I am in New York to visit the family, cannoli are on the must eat list (along with pizza, bagels, spumoni and prosciutto bread).  If you've never had one, a cannoli is an Italian pastry.  It's a crispy tube (almost like a waffle cone) filled with a sweet ricotta filling.  They are usually garnished with mini chocolate chips.  Here's a pic:


Cannoli aren't so easy to find down here in South Louisiana.  I finally happened upon a fruit market owned by an Italian family that stocks the shells, so I can make them myself.  However, I recently discovered a quick and easy way to get my cannoli fix without all the fuss.  Cannoli Dip!  I was watching a show on the Food Network called The Kitchen, and Jeff Mauro made a version of this that looked so good, I had to try it.  I changed it up a bit.  Here's what I did:

CANNOLI DIP WITH SWEET WON TON CHIPS

12 won ton wrappers, cut in half diagonally
melted butter (about 2-3 TBS)
sugar
pumpkin pie spice (or cinnamon)
1 cup ricotta cheese
1 tsp vanilla extract
1/4 cup powdered sugar
2 TBS mini chocolate chips

To make the "chips":

Preheat oven to 400 degrees.  Cut won ton wrappers in half diagonally.  Place in a single layer on a cookie sheet.  Brush with melted butter.  Sprinkle a bit of sugar on each, then sprinkle a bit of pumpkin pie spice onto each.  Bake at 400 degrees for 4 - 5 minutes or until crispy and golden.  Watch them closely because they will burn quickly!  Remove to a serving plate and set aside.

To make the dip:

Mix ricotta, vanilla and powdered sugar until smooth.  Put into a serving bowl then sprinkle mini chocolate chips on top.  Refrigerate any leftovers.


This is rich and delicious!  The sweet, crispy won tons take the place of the pastry shell.  You really get all the flavors of a cannoli with minimal effort.  Awesome!


Friday, August 8, 2014

Cooking 101 Part 2

In my last Cooking 101 post, I talked about the easiest ways to chop and dice.  If you missed it, you can read it here:

http://hotsouthernmessblog.blogspot.com/2014/07/cooking-101.html

Today, I want to show you the proper way to measure ingredients.  Once you've been cooking a while, you can kind of eyeball measurements.  But, when you first start out, you should measure properly.  When you bake, you should ALWAYS measure properly, no matter how long you've been doing it.  Baking is an exact science.  Accurately measuring ingredients is the key to success.

First, let's talk about the difference between wet and dry measuring cups.  When you measure liquid ingredients, you should use a cup with a spout and measurement lines on the side.  Fill it to the line of the measurement you need and look at it from the side, not from above, to make sure it is exactly on the line.


This is how you should measure all liquids.

Dry ingredients should be measured in dry measuring cups that can be filled up to the top and leveled off.  They come in a variety of sizes.  A set usually includes 1/4, 1/3, 1/2 and 1 cup sizes.


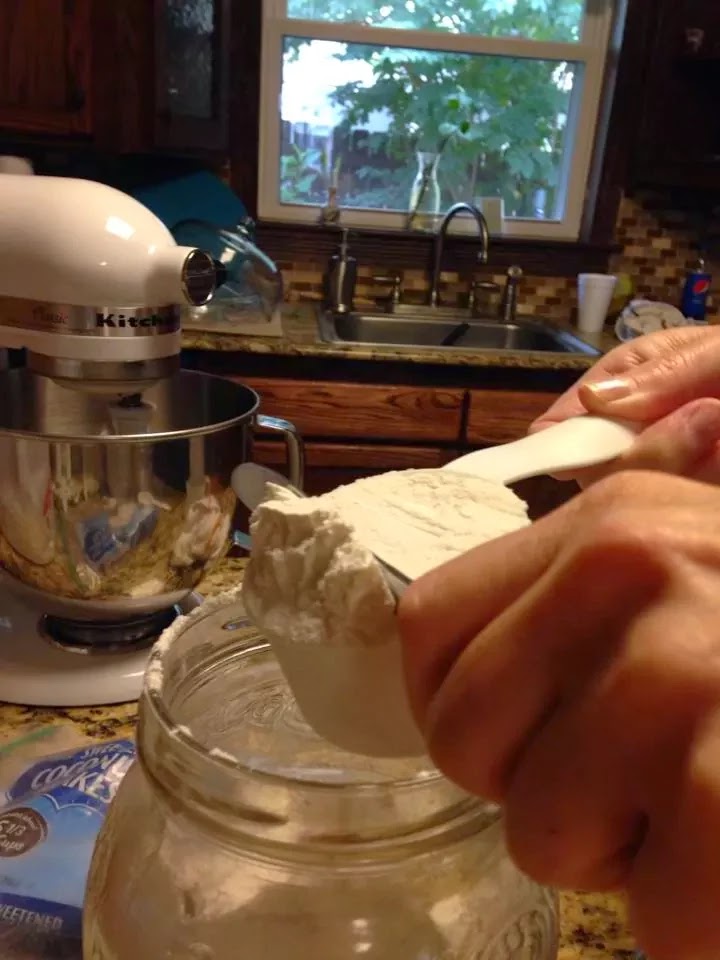
Now, I'd like to talk about how to measure specific ingredients.  The first ingredient is flour.  When you measure flour, you don't want it to be packed down.  You want it to be light and airy.  What I do is use a spoon to fluff it up, then gently spoon the flour into a dry measuring cup.  Finally, use a butter knife (flat edge) to even off the top of the cup.


Flour should never be packed down, brown sugar on the other hand, should be.  Sometimes a recipe will specifically say "1/4 cup packed brown sugar" sometimes it won't.  However, it is a good rule of thumb to pack brown sugar.  All that means is that you spoon it into the dry measuring cup, then press it down with your hand until it's level with the top of the cup.


Using measuring spoons is similar to dry measuring cups.  Just fill it up and level it off.


Here is a tip about measuring baking soda.  The box has a built-in flat edge that you can use to level it off.


The baking powder can has a flat edge as well.


Another tip:  When you are baking something, say a cornbread, measure the dry ingredients into a bowl, then measure the wet ingredients into a separate bowl.  Then, mix the wet and dry ingredients together.  This is a tried and true method.  If your recipe has specific instructions, follow them, of course.  Otherwise, this is the way to go.

So, now you know the right way to measure liquid and dry ingredients.  You're one step closer to becoming the next Iron Chef!  Happy Cooking!


Sunday, August 3, 2014

Crockpot Chicken Fajitas

I must admit, when I first saw this idea floating around on Pinterest, I was skeptical.  Chicken fajitas made in a crockpot?  Would they have that same wonderful flavor I've come to know and love?  Or would it be a soggy mess?  I decided to give it a try and find out.  Here's what I did:

CROCKPOT CHICKEN FAJITAS

2 large boneless, skinless chicken breasts
1 onion, sliced
1 bell pepper, sliced
1 packet fajita seasoning mix (or taco seasoning)
1/2 cup water
Salt and pepper

Pour water into crockpot.  Place onions and peppers on top.  Season to taste with salt and pepper.


Lay the chicken breasts on top.


Sprinkle the fajita seasoning on top of the chicken.


Cover and cook on high heat for 3 hours.  Do not open the lid while it's cooking!  After 3 hours it looks like this:


Remove the chicken to a plate.  Shred with two forks.


Return the shredded chicken to the crock pot and stir to combine it with the onions, peppers and juices.


Serve on tortillas with whatever fixins you like.


Now, did these taste like the fajitas you get at your favorite Mexican restaurant?  No.  They are missing the char from a grill.  But, they were moist and tasty.  It's a great way to make supper with very little effort.  Plus, you get a lot of mileage out of two chicken breasts!  You don't have to make fajitas.  You could use this recipe to make burrito bowls with beans, rice, cheese, etc.  You could make crunchy tacos or enchiladas.  Or you could throw it on some pizza dough with salsa (for the pizza sauce) and cheddar cheese.  The possibilities are endless.  So, give this a try if you want an easy way to make a chicken dinner.