Showing posts with label Italian. Show all posts

Monday, December 4, 2017

Italian Sausage, Peppers and Potatoes

My Old School Italian Husband was reminiscing the other day about a dish his Mom used to make.  I was lucky enough to have her teach me many of her recipes but she hadn't mentioned this one.  It was Italian Sausage baked with onions, peppers and potatoes.  Now, my husband does not cook.  He had no idea how she made it.  He did his best to describe it to me and I gave it a shot.  Here's what I did:


ITALIAN SAUSAGE, PEPPERS AND POTAOES

1 lb Italian sausage
1 onion
1 bell pepper
5 medium sized potatoes
oil
salt/pepper
fresh Italian Parsley

Preheat oven to 400 degrees.

Rinse and dry the potatoes.  Cut into medium sized chunks.  Place on a large baking sheet with sides.  Drizzle with oil and season with salt and pepper.  Stir well.  Arrange in a single layer.  Bake for 30 minutes.


Meanwhile, cut the onion and bell pepper into medium sized chunks. 


Then cut each sausage link into 3 pieces.


After 30 minutes in the oven, remove the potatoes and stir them.

Add the sausage, onions and peppers.

Drizzle with a little more oil and season with a little more salt and pepper (not too much, the sausage is already salty).


Return to the oven and bake another 30 minutes or until sausage is cooked through.

Sprinkle with chopped fresh parsley.


That's it.  It was so easy, I expected my husband to say it wasn't the same.  But he didn't.  He said it was great and tasted just like his Mom's.  He was happy, which made me happy.  My kiddos loved it, too.  Everyone happy with an easy to make supper?  This one's a keeper, for sure!

Tuesday, September 13, 2016

Italian Stuffed Vidalia Onions

Hi everyone!  It's been a while.  Sorry.  We are still dealing with the aftermath of all the flooding here.  My parents are living with us because they lost their home, so we've been helping them with all the issues that follow a disaster (dealing with FEMA and insurance adjustors, etc).  Not fun.  The worst part is watching my Mama grieve for family treasures that were washed away.  Not expensive things.  Irreplaceable things, like her Mama's Bible and the kids' baby blankets.  It's rough.  But, life does go on even when we think it can't possibly.  There's is just one of thousands of stories of  Louisiana families who have lost everything.  Please keep these good folks in your prayers.

Now, let's talk about food.


This stuffed onion recipe is fantastic!  I use sweet Vidalia onions, but you can use any onion.  (Though, sweet onions are the best!)


ITALIAN STUFFED VIDALIA ONIONS

3-4 Vidalia onions (I used 3)
1/2 lb Italian sausage, casings removed
1/2 lb ground beef
2 cloves garlic, minced
1 can Italian style diced tomatoes
salt and pepper
Italian seasoning
Mozzarella cheese (I like whole milk, but you can use shredded)
Grated Parmesan cheese

Preheat oven to 400 degrees.

Peel the onions.  Cut the very ends off so they will sit flat.


Then, cut them in half across the middle.


Scoop out the middle of each onion with a spoon.


You want to remove enough to have room for the stuffing but not so much that they won't hold up when baked.  They should look like this:


Place a small bit of onion in the bottom to cover up the hole.


Now, take all those pieces of onion you removed and chop them up.

Brown the ground beef and sausage with the chopped onions and the garlic.


Once browned, you want to drain the excess grease.  Here's a tip:  I place a colander on top of a bowl then scrape all of the beef mixture into the colander.  Let it sit for a few minutes and the grease will drain away into the bowl underneath.


Place the drained beef mixture back in the pot and add the can of diced tomatoes (including the juice).


Season to taste with salt, pepper and Italian Seasoning.  Let simmer for 5 minutes.


If you are using block cheese, cut into small cubes (I use 8 small cubes per onion.  You can use less if you like).


Place the onions in a baking dish then add 4 cubes of cheese to the bottom of each onion.  If you are using shredded cheese, just sprinkle some in.


Next, spoon some of the beef mixture into each onion.


Then, add 4 more cubes of cheese on top (or sprinkle the shredded cheese on top).


Finally, sprinkle a little grated Parmesan cheese on top of each.


Lightly grease a sheet of foil (or spray with cooking spray) so it won't stick to the cheese.


Cover the baking dish with the foil (greased side down).  Bake at 400 degrees for 25 minutes.  Then, remove the foil and bake for 5 minutes more.


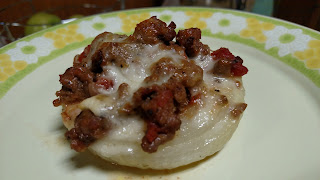
These came out awesome!  Taste a little like pizza!  They were soft and sweet with a little spice from the sausage, so good!  


 You need to make these tonight!  Seriously.  You won't be sorry.

Wednesday, August 20, 2014

Italian Stuffed Chicken

I cook chicken a lot, especially boneless, skinless chicken breasts.  I am always looking for new ways to prepare it.  This idea came to me while I was shopping.  I saw some sun dried tomatoes and Parmesan cheese next to each other in my buggy and inspiration struck!  Stuff chicken breasts with a mixture of Italian flavors.  I tried it and it worked.  These were delicious!  Plus, they look impressive.  You could definitely make them for a dinner party.  No one needs to know how easy they are to make.

ITALIAN STUFFED CHICKEN

6 small or 4 large boneless, skinless chicken breasts
2 TBS minced sun dried tomatoes
1/2 cup Italian bread crumbs
1/4 cup grated Parmesan cheese
1 TBS chopped fresh parsley (never use dried parsley, yuck!)
2 TBS olive oil (plus more to drizzle on chicken)
Salt & pepper to taste

Preheat oven to 400 degrees.  Mix together the sun dried tomatoes, bread crumbs, Parmesan cheese, parsley and olive oil.  Salt and pepper to taste (easy on the salt, the cheese is very salty).  Set aside.


Cut a pocket in the side of each chicken breast:


Don't cut all the way through, just enough to form a pocket to stuff.

Spoon some stuffing into each pocket.


Use a toothpick to close the pocket.  This keeps the stuffing from coming out during baking.


Drizzle a little oil on the bottom of a 9x13 baking dish.  Place stuffed chicken into dish and brush a little olive oil onto each piece of chicken.


Sprinkle a little salt and pepper on each.


Bake for 30 minutes.


Be sure to remove the toothpicks before eating!


These are so flavorful!  They are literally stuffed with bold flavors.  But, they're really easy to make!  Give these a try.  Your friends and family will think you're a culinary wiz.  If only they knew...


Sunday, June 22, 2014

Great Grilling

I grill all the time.  Living in South Louisiana, the winters are usually mild, so I can grill year round.  I recently asked my husband for an outdoor sink (to make it easier to cook outside, I already have a mini fridge out there.  I was going for a simple outdoor camping-type set up).  He, going overboard as usual, built me a complete outdoor kitchen.  I'm talking pergola overhead with ceiling fans and lights, cabinets with granite counter tops, and a sink.  Don't get me wrong, I'm not complaining.  I love my outdoor kitchen!  I just find it funny.  I'm almost afraid to ask for a sink in my laundry room, he might remodel the whole house!

Now that I have this great outdoor space, I am a grilling fool!  I grill almost every night.  I have been searching for new recipes and ideas because there's only so many burgers and dogs a person can eat.  Here is what I made the other night.

ITALIAN MARINATED CHICKEN BREASTS

4 boneless, skinless chicken breasts (I cut them into tenders, but you can leave whole)

Marinade:
1 tsp Dijon mustard
2 TBS red wine vinegar
2 tsp sugar
1/2 tsp salt
1/4 tsp black pepper
1/2 tsp dried oregano
1/2 tsp dried basil
1/2 tsp garlic powder
1/4 tsp onion powder
6 TBS olive oil (or canola oil)
2 TBS grated Parmesan cheese

There is no better way to make salad dressings or marinades than using a jar with a tight-fitting lid.  It's so easy!  Plus, if you have extra, you can just keep it in the jar in the fridge.  Just clean out that jelly jar after you've finished off the jelly and keep it in a cabinet.

Place all of the marinade ingredients into the jar.  Make sure the lid is on tight, then shake it until well blended.  Place the chicken breasts in a zip top freezer bag (they are a little thicker than storage bags) and pour the marinade in.  Close the bag and squeeze it until the marinade is evenly distributed.  You can place this in the fridge for several hours.  If you don't have that much time, just leave it out on the counter at room temperature for 30-45 minutes.  This does two things, it infuses the meat with flavor and it lets the meat come to room temperature before it goes on the grill.  That is super important when grilling!  Even if you marinate something overnight in the fridge, you must let it sit and come to room temperature.  If the meat is too cold when it goes on the grill, it will seize up and be tough.  Those extra 30 minutes will make a huge difference!


Once the meat is at room temp, place it on a clean, hot grill.  Another tip is clean your grill regularly.  Meat will stick to a dirty grill.  You can cut a lemon in half, hold it with some tongs, and clean the grates when they are hot.

Grilling time depends on the size of your chicken breasts.  Obviously, larger breasts will take more time and tenders will cook pretty quickly.  The USDA says to cook chicken to an internal temperature of 165 degrees.  Take it off at 160 as it will continue to cook as it rests.  If you don't have a thermometer, just cook it until it's no longer pink and the juices run clear.  I have found that on medium heat an average size chicken breast takes about 6 minutes on each side.


Once the chicken comes off the grill, let it rest!  That goes for any meat.  If you cut into it right away, all the juices will run out onto your plate and your chicken will be dry.  Let it sit a few minutes and the juices will redistribute throughout the meat and every bite will be tender and juicy and delicious.

Any leftover chicken goes great mixed with pasta and grilled veggies.  Make a little extra chicken and grill the veggies so you'll have an easy supper the next night.  All you'll have to do is boil some pasta!


An easy side dish for any grilled supper is potato packets.

POTATO PACKETS

1 russet potato per person (or 2 reds), diced
1 pat of butter per person
salt/pepper
green onions, sliced
canola oil
1 square of heavy-duty foil per person

In a large microwave-safe bowl, place diced potatoes.  Add a few tablespoons of water.  Cover and microwave for 5 minutes.  (If you have a microwave steamer, that works great for this)  This partially cooks the potatoes to cut down on grilling time.


Evenly distribute potatoes between each foil packet.  Drizzle with a little oil.  Season to taste with salt and pepper.  Sprinkle with greens onions.  Place a pat of butter on top of each.


Fold each packet, leaving room inside, but closing tightly.


Place on indirect heat on the grill.  I put them on the top rack of my gas grill.  Let them grill about 10-15 minutes on indirect heat.


These are fun.  Everyone gets their own packet full of potatoes.  Open them carefully (there will be steam!).

You can add anything you like to these, diced bell pepper or jalepeno, bacon bits, ham.  We added bacon salt.  Yes, you heard  right, bacon salt.  My son loves bacon!  He had a gift card from Think Geek and when he saw this, he had to have it.  We sprinkled some on the potatoes and it was awesome!  If you want some, go to BaconSalt.com.


So, there you have it.  Two easy, delicious additions to your grilling routine.  Hope you enjoy!