Friday, September 28, 2012

A Little Bit Better For You

Everyone wants to eat healthier.  But, no one wants to give up all of their favorite guilty pleasures.  So, don't!  You can still have them if you just make a few changes.  A couple of tweaks here and there and poof!  That deep fried nugget of deliciousness just dropped some calories and fat like a hot rock.  This is not diet food, by any means.  I hate the word "diet"!  It's not a coincidence that the first part of that word is "die".  No, it's not diet food, but it is a little bit better for you.


This first recipe is Old School Italian Husband-Approved (and that ain't easy to do).

BAKED CHICKEN PARMESAN

6 small chicken breasts (boneless and skinless)
salt/pepper
3 slices whole wheat bread
1/2 cup parmesan cheese (plus more for topping)
1/2 tsp dried basil
1/2 tsp dried oregano
1 egg
1/4 cup lowfat milk
flour for dredging
1 jar spaghetti sauce (or make your own)
part skim mozarella cheese

Preheat oven to 400 degrees.  Here's a trick:  put your baking dish in the oven while you're preheating.  The hot dish will help crisp up the bottom of your chicken.

Make your own bread crumbs by zipping the bread in a food processor.  It's way cheaper and you can use whole wheat bread if you want, so it's a little healthier.

Get out 3 shallow dishes (pie pans or plates with a lip).  In the first dish, add enough flour for dredging (about 1 cup or so) and season it with salt and pepper.  In the second dish, whisk together egg and milk and season with salt and pepper.  In the third dish, mix bread crumbs, 1/2 cup parmesan cheese, basil, oregano, and salt and pepper. (You want to season each layer to add more flavor).

Season chicken breasts with salt and pepper.  Dredge each in the flour, then egg wash, then bread crumbs.  Set aside on a rack until all are breaded.  When all of the chicken is prepared, remove the hot baking dish from the oven and spray it with cooking spray.  Place chicken on dish.  Spray top of chicken with a bit of cooking spray (to help it crisp up).  Bake at 400 degrees for 30 minutes.


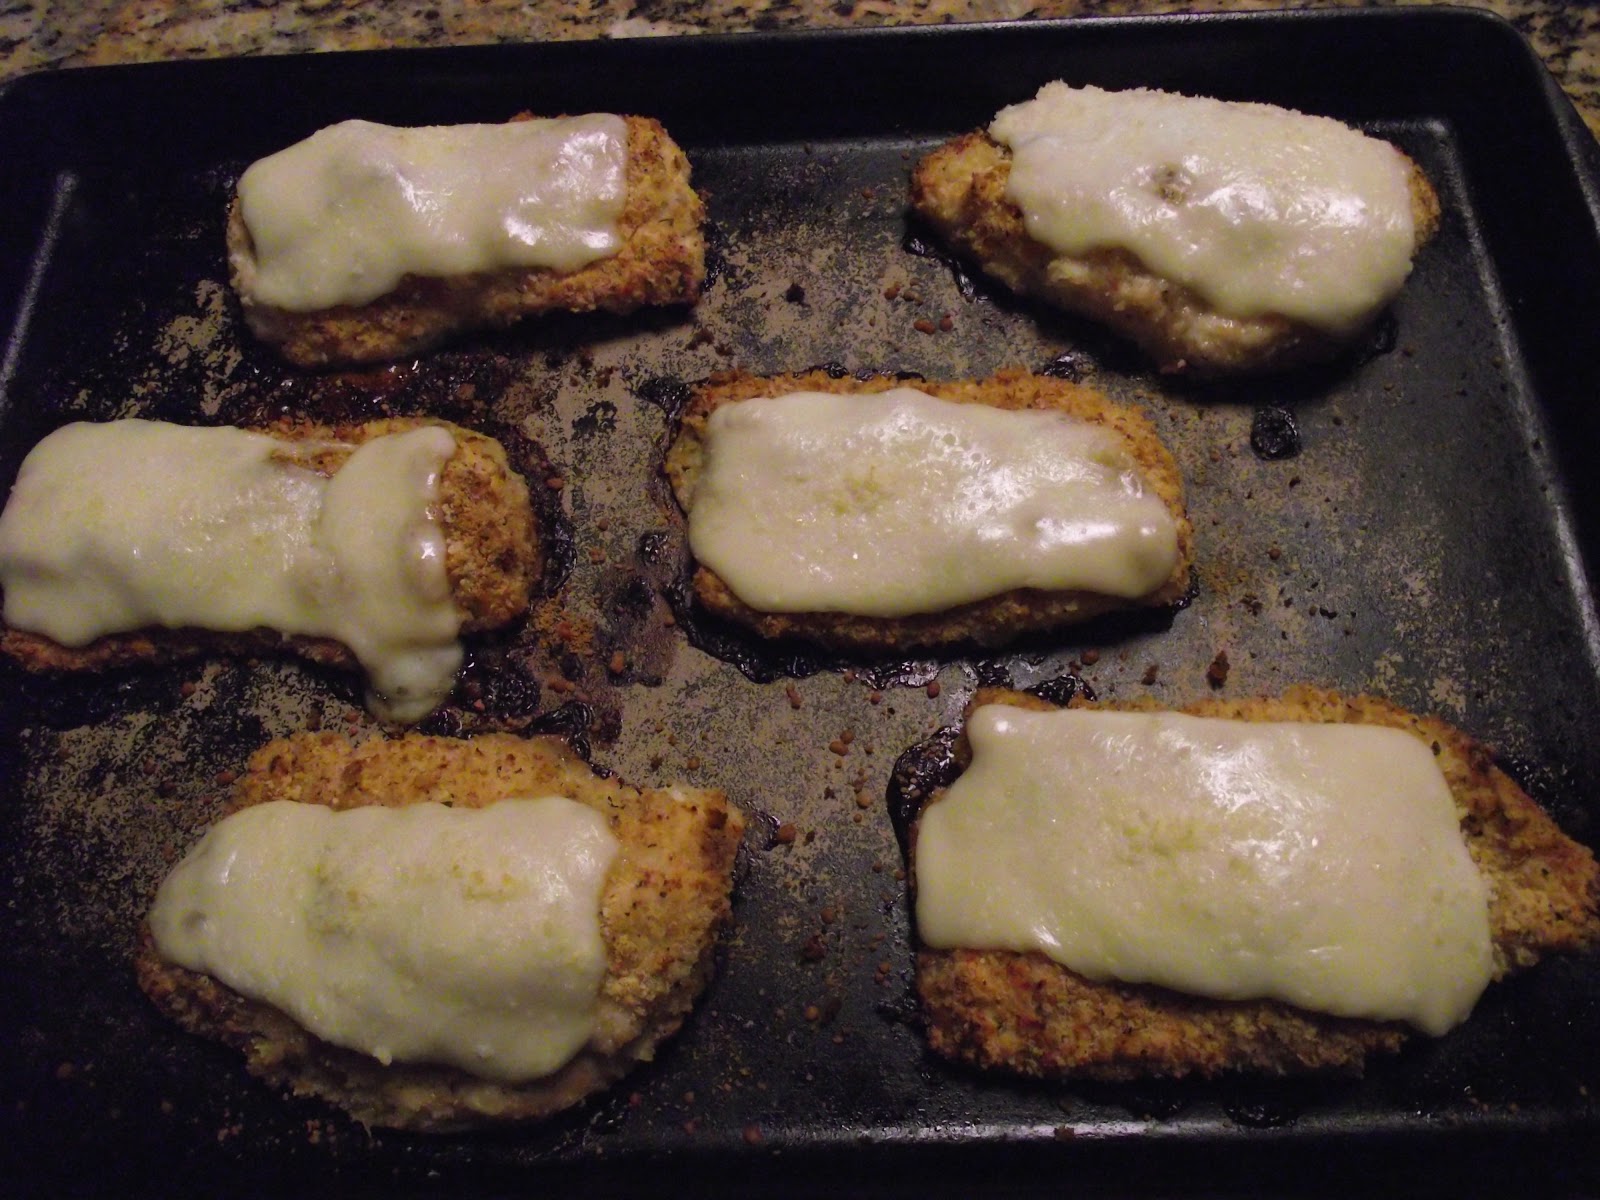
Meanwhile, heat spaghetti sauce in a pot on the stove.  When chicken is done, add a slice of mozarella cheese on top of each.  Then sprinkle a bit of grated parmesan on top.  Bake for 5 more minutes to melt the cheese.


Serve with the warm sauce.


You can't tell these aren't fried.  They are so good and a bit better for you!


Kids love chicken nuggets.  That's a universal truth!  But traditional fried nuggets aren't so good for little ones, especially when they want them all the time!  Every now and then swap out regular nuggets for these.  And, yes, they are Pickiest-Son-Ever Approved.

PRETZEL COATED CHICKEN NUGGETS

4 boneless, skinless chicken breasts, cut into nuggets
1 egg
1/4 cup low-fat milk
flour for dredging
salt/pepper
pretzels, crushed

Preheat oven to 400 degrees.  Use the same trick from above and place your baking dish in the oven to heat it up.  Season nuggets with salt and pepper.

Get out 3 shallow dishes (pie pans).  Put flour in the first (season with salt and pepper).  Whisk together egg and milk in the second (season with salt and pepper).  Put crushed pretzels in the third.  Dredge nuggets in flour, then egg wash, then pretzels.  After you finish them all, take the baking dish out of the oven and spray with cooking spray.  Add nuggets.  Spray the tops with cooking spray.  Bake at 400 degrees for 15-20 minutes.  Dip in BBQ sauce or

HOMEMADE HONEY MUSTARD SAUCE

2 TBS mayo (you can use low-fat if you want, but I hate it!)
2 TBS yellow mustard
1 TBS honey

Whisk everything together.  Yummy!


So, there are a couple recipes that seem like guilty pleasures, but are a little bit better for you.  Enjoy!

Monday, September 24, 2012

Don't forget about the Side Dishes

Side dishes are often an after thought.  When we think about what we're going to prepare for dinner, we always think about the main dish first and foremost.  But why should the entree get all the attention?  Side dishes are just as important.  Side dishes are just as pretty.  Side dishes are just as smart...wait a minute, I think I'm getting off track here.  :)

Anyway, here are some side dish recipes that are quick and easy (and just as popular as the main dish is...)


This recipe goes great with Asian dishes or even just plain baked chicken.  It's versatile, quick and yummy!

SESAME GREEN BEANS

1 can green beans, rinsed and drained (make sure they are dry so they don't spatter in the oil)
oil
sesame seeds
soy sauce
salt/pepper

In a small skillet, heat a little bit of oil (about a Tablespoon) over medium-high heat.  Add green beans and saute in oil for a few minutes, stirring frequently.  Add a splash or two of soy sauce and sprinkle in some sesame seeds.  Season to taste with salt and pepper.


This next recipe is fast and could not be easier.  If you can boil water, you got this.  Plus it's cheap!

RAMEN

2 pkgs ramen noodle soup mix
butter
green onion, sliced

Boil 4 cups water.  Break up the ramen noodles a little and put them in the pot.  Boil, stirring, for 3 minutes.  Drain. Add noodles back to pot.  Stir in some butter (however much you like, I usually use about two tablespoons or so).  Add only one of the seasoning packets that came with the packages.  Save the other for another use or discard.  Stir well to combine.  Garnish with sliced green onion.


Here's another pasta side dish.  Easy and delicious!

PARMESAN EGG NOODLES

8oz egg noodles
butter
parmesan cheese, grated
fresh parsley

Boil egg noodles until done.  Drain.  Return to pot.  Add a little butter (enough to keep the noodles from sticking together but not so much that they're swimming in it)  Salt and pepper to taste, but remember that you'll be adding parmesan cheese, which is very salty, so don't over do it.  Stir well to combine.  Put the noodles in a serving bowl and sprinkle parmesan cheese on top.  Then garnish with chopped fresh parsley.


The next recipe is a quick bread stick.  In case you haven't noticed, I'm not afraid of carbs.

QUICK GARLIC BREAD STICKS

1 can refrigerator biscuits (like pillsbury)
4 Tablespoons butter or margarine, melted
garlic powder
dried basil (or Italian seasoning)

Preheat oven to 400 degrees.  Pour half the melted butter onto a baking dish.  Roll each biscuit into a log shape and place on top of the butter in the dish.  Pour remaining melted butter over the top of the rolled biscuits.  Sprinkle garlic powder over each bread stick.  Then sprinkle a little dried basil over each.  Bake at 400 degrees for about 10 minutes, or until golden brown on top.


So, there you have it.  Side dishes that are quick and easy to make, plus they taste great.   I bet they'll be even more popular than the main dish.  Just sayin.


Thursday, September 20, 2012

Sweet Pork Supper

Have you ever had pork chops and apple sauce?  It's a classic combo for a reason.  They go great together. Pork and sweetness go hand in hand.  My Mama never made pork chops and apple sauce, but she always served honey with pork chops.  If you've never tried it, you must.  It is absolutely delicious!

That was sort of the inspiration for this meal, but it has a bit of an Asian twist.  The side dish of sweet potatoes is decidedly southern.  So, let's call this Down-home Asian fusion.  (wink)

PINEAPPLE TERIYAKI PORK CHOPS

4 pork loin chops, about 1 inch thick (with the bone - more flavor)
salt/pepper
1/2 of a (20oz) can of crushed pineapple
1 TBS brown sugar
1 tsp garlic powder
1 tsp ground ginger (or 1 TBS minced fresh ginger)
1/3 cup soy sauce

Preheat oven to 400 degrees.  Season pork with salt and pepper and place in a 9x13 baking dish (sprayed with cooking spray).  Mix remaining ingredients together in a large measuring cup and pour over chops.  Cover with foil and bake for 45 minutes.  Remove foil and continue to bake 5-10 minutes more.


These were so tender and sweet!  Delicious.


To go with it I made something my Maw Maw Ida used to make.  Only, I didn't know she made this dish until I was telling my Mama about it and she said, "That was your Maw Maw Ida's favorite!  She made it all the time."  What a joy to find out she loved this dish as much as I do.  I think food is a wonderful way to remember those who aren't with us anymore.  This one's for you, Maw Maw Ida:

OLD FASHIONED SWEET POTATOES

sweet potatoes
butter
sugar

Bake sweet potatoes in a 400 degree oven until just soft (not too soft - just fork tender).  Let them cool a little then peel them.  Slice them into 1/2 inch thick slices.  Put some butter into a skillet and heat over medium-high heat.  Place slices into the skillet and fry on both sides until golden.  Remove to a serving platter and sprinkle with sugar.


Very simple, but so good!  As a variation, you can sprinkle them with brown sugar and cinnamon.  Yum!

So, give these recipes a try and have a little sugar with your supper!


Sunday, September 16, 2012

Coffee!

Coffee is very important in the South, especially in Cajun culture.  It's almost a way of life.  Whenever anyone comes by to visit, you put on a pot of coffee.  That's just the way it is.  I can't remember one single time that my Mama didn't greet guests with a cup of coffee.  Not one time.  Ever.

When I was a little girl, she used to give me "coffee milk", which is essentially milk and sugar with a touch of coffee for color.  But I remember feeling so grown up drinking from a little demitasse cup.  It was my very own "Cajun tea party".  I did the same thing for my kids and I hope they continue the tradition with their own some day.

The smell of coffee brewing is my favorite smell in the world.  I'm usually the first one awake in my house, but on those few occasions when my husband makes coffee and I get to wake up to that glorious smell, well that's just like a little piece of heaven on earth.

Here are a few recipes that either feature coffee as an ingredient or go great with a cup:


The first recipe has to be a coffee cake.  Classic and universally loved, the coffee cake is a great dessert to serve to guests while enjoying a cup of coffee.  This is an easy and inexpensive version.  I have a small bundt pan (1/2 size) but if you don't have one you can use a regular 9 inch cake pan.

COFFEE CAKE

1 stick butter, softened
1 cup sugar
1 egg
1/2 cup sour cream
1/2 tsp vanilla extract
1 cup all-purpose four
1/2 TBS baking powder
1/8 tsp salt
Cinnamon mixture:
1/8 cup sugar
1/2 TBS cinnamon
1/2 TBS brown sugar

Preheat oven to 350 degrees.  Spray pan with cooking spray.  Mix together butter and sugar with a mixer.  Add egg, sour cream and vanilla.  Mix until well blended.  In a separate bowl, mix flour, baking powder, salt.  Add dry ingredients to wet ingredients and gently mix until combined.  In a small bowl, combine ingredients for cinnamon mixture.  Pour half the batter into prepared pan.  Sprinkle cinnamon mixture over batter.  Pour remaining batter over top.  Bake at 350 degrees for 35 minutes or until a toothpick inserted in center comes out clean.


QUICK CAPPUCCINO

vanilla ice cream
coffee
sugar, if desired

Melt some vanilla ice cream in the microwave.  Add as much as you like to a cup of coffee.  Put in a blender and blend it well (this will make it frothy).  Pour into a mug and microwave until hot.  Add sugar to sweeten to taste.


COFFEE FREEZE

1 cup milk
1 cup frozen cool whip
1 pkg instant vanilla pudding mix (or chocolate)
1 TBS instant coffee
ice

Put 1 cup milk in large measuring cup.  Add ice to make it measure 3 cups.  Pour into blender.  Add the rest of the ingredients.  Cover and blend until smooth.  Pour into glasses.  Makes 4 servings.


CAKE BROWNIES

1 box chocolate cake mix
3 eggs
1 stick butter, softened
1 cup chocolate chips
1/4 cup coffee (leftover from morning)

Preheat oven to 350 degrees.  Mix cake mix, eggs, butter and coffee until well blended.  Stir in chocolate chips.  Spread batter into a greased 9x13 pan.  Bake at 350 degrees for 25 minutes.  Do not over bake.  Let cool completely before cutting into squares.


These were so cakey, fluffy and delicious.  The coffee just kicks up the chocolate flavor.

This recipe make so much, that I needed to come up with another way to serve them.  So I made this:

TRIPLE CHOCOLATE TRIFLES

leftover cake brownies
1 pkg instant chocolate pudding
1 3/4 cups milk
1/4 cup whipped cream (readywhip or cool whip)
chocolate chips
whipped cream for garnish

Mix instant pudding mix, milk and 1/4 cup whipped cream.  Let sit 5 minutes to thicken.  Cut leftover brownies into small cubes.  In small, clear dessert dishes (or juice glasses) layer small cubes of cake brownies, some chocolate pudding, a few chocolate chips.  Repeat layers.  Top with whipped cream.  So yummy!  These look elegant enough to serve at a dinner party, but easy enough to make anytime.


So, enjoy your morning coffee, then use it as inspiration to make some delicious treats!

Monday, September 10, 2012

Chicken & Rice Tastes So Nice

We eat a lot of chicken.  So, I'm always looking for new ways to cook it.  In fact, if you have any interesting chicken recipes you'd like to share, please do.  I recently hit a sale where chicken breasts were $1.00 per pound, so I stocked up!  Only problem is finding something different to do with them.

We grow a lot of rice down here in Cajun Country.  It's a staple in our house.  It's cheap and it's filling; a great way to stretch a meal.  But the main reason I love it is because it's so versatile.  It's a blank slate.  You can serve it plain or with gravy.  You can use it in Chinese cooking, Cajun cooking, Italian, Mexican, etc.

My Mother-in-law makes a chicken & rice dish that is so delicious.  My husband loves it.  So, I decided to try and make a version myself.  And I have to say, it was a winner.  My son (the pickiest eater on the planet) had three helpings!  Three!  That's unprecedented in our house.  Here's how I did it:

SO NICE CHICKEN & RICE

1 TBS oil
1 TBS butter
6 small chicken breast halves (boneless, skinless) or 4 larger ones
salt/pepper
1 onion, chopped
1 stalk celery, diced
1 large carrot, diced
1 green onion, sliced
2 cups rice
3 cups chicken broth + 3/4 cup water

Pat chicken dry with a paper towel.  Season on both sides with salt and pepper.  Heat a large skillet (with a tight fitting lid) on medium-high heat.  Add oil and butter.  Brown chicken on both sides.  Remove from skillet and set aside.  Add onion, celery, carrot and green onion.  Season with salt and pepper.  Saute until softened.  Add rice and toast up for a few minutes, stirring.  Season rice with a bit of salt and pepper.  Add broth and water.  Bring to a boil.  Add chicken back to skillet.  Cover, reduce heat and simmer for 25 minutes or until rice is tender and chicken is cooked through.


This makes a ton of food!  And the leftovers are even better.  You can even reheat just the left over rice and use it as a side dish later in the week.
Plus, you can use this recipe as a starting point and add anything you like.  Tomatoes, mushrooms, asparagus, black beans, etc.  You can change the flavor profile by adding different seasonings (Italian seasoning, taco seasoning, etc.)  But plain old chicken & rice was pretty good!

So, if you are looking for a new way to make chicken, try this Chicken & Rice...it tastes so nice!

Friday, September 7, 2012

Indoor BBQ

I was really in the mood for BBQ the other day.  I use my grill all the time!  Living in the South means milder winters and I take full advantage.  I cook outside every chance I get.  I gathered up all my ingredients and headed outside only to realize that my grill's propane tank was empty.  Dejected, I headed back inside to figure out what I would make instead.  But, then I thought, why not make BBQ indoors?  So, that's what I did.


INDOOR BBQ CHICKEN

6 small boneless skinless chicken breasts
season salt
1/2 cup bbq sauce
1/4 cup chicken broth

Preheat oven to 400 degrees.  Place chicken in a 9x13 baking dish.  Season it on both sides with season salt.  In a small bowl, whisk together bbq sauce and broth.  Pour over chicken.  Cover with foil.  Bake at 400 degrees for 20 minutes.  Remove foil and spoon sauce over chicken.  Put it back in the oven and bake uncovered for 10 minutes.


This recipe came out great!  Tender and juicy!


To go with the chicken I threw together some quick bbq beans.  Here's how I did it:

BBQ BEANS

2 cans pork & beans
3 TBS brown sugar
3 TBS bbq sauce (your fav brand)
1 TBS yellow mustard
a few dashes worcestershire sauce

Mix everything together in a cast iron skillet (or pot).  Cook on the stove top:  Bring to a boil, reduce heat and simmer for 10-15 minutes until thickened.  Cook in the oven:  Put the skillet in the oven and let it bake alongside the chicken for 20-30 minutes until thickened.  Easy!


To round out the meal I threw some frozen corn on the cob into the microwave.  You could char up the corn on an indoor grill pan after it comes out of the microwave.  That would give it pretty grill marks and a smoky flavor!

So, there you have it.  Indoor BBQ.  Whether it's raining outside, too cold, or you just run out of gas, you can still have a bbq.  Set your table with a checkered table cloth and paper plates, then it will really feel like a bbq and you don't have to do dishes.  WooHoo!

Tuesday, September 4, 2012

Ode to a Cast Iron Skillet

Ode to a Cast Iron Skillet

I love you, cast iron, I must confess
You make a great panini press
You're wonderful when I bake
Whether it's a cobbler or a cake
You're naturally non-stick
You sear a steak so quick
You are forever steadfast
Passed down the generations because you last
I coat you in a bit of oil to keep you good lookin'
Because, if I take care of you, you'll take care of the cooking!


In case you couldn't tell, I love my cast iron skillets!  They can do so many things and last forever.  One of my most prized possessions is a cast iron dutch oven that belonged to my Maw Maw.  It is so well seasoned, I don't even have to add oil when I cook in it.  It holds heat so well and it just looks cool!  So rustic and great to serve from, it keeps the food warm longer.  If you don't have anything cast iron, go buy a skillet now!  They are inexpensive and so versatile (use it on the stove top, in the oven, even on a campfire).  Plus, with a little TLC, it'll outlast everything in your kitchen.

TIPS FOR CARING FOR CAST IRON

You can buy them pre-seasoned, but if not here's how you season it:
Coat it well with vegetable oil (or shortening) and place it upside down in a 350 degree oven (put a cookie sheet on the rack below it to catch drips) for 1 hour.  It won't be black yet, but it'll get there.  The more you cook with it, the more seasoned it gets.

After you cook, you must clean.  Never let it soak in water!  That will cause it to rust.  And this may sound weird, but don't use soap.  Rinse it with hot water right after cooking (while still hot).  If something is stuck on, scrub it with a plastic scrubby sponge or use kosher salt as an abrasive.

Always dry it completely or it will rust!  This is what I do:  After cleaning, dry it with a clean cloth, then put it on the stove on medium heat until dry.  Then, coat it with a bit of oil (not too much) using a paper towel or some wax paper.  Be careful - it's hot!  Then let it sit to cool.  Do this and you'll have a naturally non-stick skillet!

It may seem like a lot of work (compared to just throwing a pan into the dishwasher) but it is so worth it!


Here are some recipes using cast iron:

CHICKEN AND BISCUITS

2 boneless chicken breasts, cubed
1 can mixed vegetables
1 can cream of chicken soup (or cream of mushroom)
1 can refrigerated canned biscuits
salt/pepper
1 TBS melted butter
1 tsp garlic powder
1 tsp Italian seasoning

Preheat oven to 400 degrees.  Season chicken with salt and pepper.  Brown chicken in cast iron skillet on medium-high heat.  Drain and rinse vegetables.  Add to skillet.  Add cream of chicken soup and stir well.  Bring to a simmer.  Then remove from heat.  Separate biscuits and place them on top of chicken and veggie mixture.  In a small bowl, mix butter, garlic powder and Italian seasoning.  Brush on top of biscuits.  Put skillet into the oven and bake at 400 degrees for 10 minutes.  Serve directly from cast iron skillet.


Have you ever had cornbread with that great crust on the bottom?  It was baked in a cast iron skillet.  The trick is to heat the skillet on the stove before you add the batter.

BACON CHEDDAR CORNBREAD

1 box Jiffy corn muffin mix
1 egg
1/3 cup milk
3 slices bacon, cooked and crumbled
1/2 cup shredded cheddar (use more if you want it cheesier)

Preheat oven to 400 degrees.  Mix everything together.  Heat cast iron skillet on the stove.  When it's hot, add cornbread batter.  Put it in the oven and bake 20 minutes or until golden.


Cast iron is also great for dessert.  It's perfect for making a cobbler like in the pic below (see my recipe for Maw Maw Joy's Peach cobbler in an earlier post) or a cake.


PINEAPPLE UPSIDE DOWN CAKE

1 stick butter
1/2 cup brown sugar
1 can pineapple rings, reserve juice (or you can use crushed)
maraschino cherries
1 small box Jiffy yellow cake mix(if you can't find Jiffy, use half of a regular cake mix)
1 egg

Preheat oven to 350 degrees.  Melt butter and brown sugar in cast iron skillet on low heat.  Meanwhile, mix cake mix, egg and 1/2 cup pineapple juice (use the juice from the can of pineapple rings).  Set aside.  Once butter and sugar are melted, remove from heat. Be careful not to burn the sugar!  Place pineapple rings on top of butter mixture (or crushed pineapple).  Place a cherry inside each ring.  If using crushed pineapple, just place cherries around in a pretty pattern.  Then pour cake batter on top.  Bake at 350 degrees for 20 minutes or until a toothpick inserted in center comes out clean.  Let cool a few minutes, then invert onto a serving plate.


So, if you really want to cook
then take another look
at a cast iron skillet!

Sunday, September 2, 2012

Cooking Up a Storm

Life in Louisiana brings with it an extra season to the year...hurricane season.  From June to November we always keep an eye on the tropics.  We don't panic, but we like to be prepared.  A big part of that preparation is "What are we gonna eat?"  Down here we're always thinking about food, and hurricane season is no exception.  Having lived through several storms, most recently Hurricane Isaac, I've had to cook for family and friends, with no electricity, for extended periods of time.  I've learned a few tricks along the way.

If you have a gas stove, you can cook even if the power is out, on the stove top, not the oven.  But, a cast iron skillet on the stove top can do a lot of things.  If you have an electric stove, obviously it won't work without power.  But, you can use your outdoor grill, one with a side burner is especially great.  A gas or charcoal grill can be a big help when you're looking at a week without power.  There's only so much canned soup and crackers you can tolerate!

The first thing I try to do is use up any meat from the freezer before it goes bad.  I hate to waste food and that can be the biggest waste of all (you didn't even get to cook it)!  Grill it outdoors or fry it in a skillet on your gas stove top.  Another way to cook it is to braise it.  Using a big pot with a well-fitting lid, brown the meat(season it first), then add a little liquid (water or canned broth).  Bring it to a boil, then cover and lower the heat to a simmer.    Let it simmer a good long time (go play monopoly with your kids) until tender.  Serve it over rice or pasta (again - things you can cook on a stove top).

Here's a recipe for a bread you can make on the stove top:

SKILLET BISCUIT BREAD

2 cups self-rising flour
3/4 cup buttermilk
1/4 cup oil

Combine all ingredients with a fork.  Do not over mix.  With floured hands, gently knead.  Oil a cast iron skillet and set over medium heat.  Put dough into skillet.  Cook 7-8 minutes until browned in spots.  Lift it out onto a plate.  Flip it into skillet and cook the other side 5-6 minutes or until cooked.  Transfer to a plate.  Cut it into wedges.  Serve with butter.


The kids want the waffles that are defrosting in the freezer,  but no electricity = no toaster.  Use a cast iron skillet (or any heavy skillet that holds heat well) as a toaster.  Heat it up then lay the waffles in the dry skillet (no oil).  Let them heat, flipping often, and they'll toast up nicely.

Make breakfast foods for supper (or lunch).  Make omelets with whatever you have in the fridge (before it goes bad!)  Make french toast (use up that day old bread and eggs).

Make grilled cheese sandwiches to go with that canned soup!

Your grill can act as an oven.  Bake frozen pizzas (if you have them in your freezer, you need to use them) on the grill (just close the lid and it will be an oven).  Just be careful not to get your grill too hot or it can burn the crust.

You can also, make foil packets to put on the grill.  For example:  Lay out a sheet of aluminum foil.  Put a piece of fish in the center.  Season the fish with whatever you like (salt/pepper/cajun seasoning).  Add a slice of lemon on top then drizzle with a little oil.  Fold up the foil and seal to form a packet.  Put it on the grill and let it cook (the steam will cook the fish).  You can also do this with veggies for a side dish.


So, those are just a few ideas that you can use when the power is out.  I pray another hurricane never comes our way, but if it does I know what I'll be doing...cooking up a storm.