Wednesday, May 22, 2013

Potatoes!

Maybe it's the Irish in me (my Mama's ancestors are from Ireland), but I just love potatoes.  Fried, mashed, boiled, baked, smothered, it doesn't matter how you fix 'em, I'll eat 'em!  So, I thought I'd share a couple of my favorite potato recipes.  Here they are:

This first recipe uses potatoes, but it's not entirely Irish.  It's Cajun, too and not only because of the spices used.  It was created using two standard Cajun guidelines:  Don't waste anything and make something delicious out of something meager.  Irish or Cajun?  It's kind of like me, a mixture of the two.

CAJUN HASH

2 links smoked sausage, sliced
1 onion, chopped
1 stalk celery, chopped
1/2 bell pepper, chopped
6 medium-size Idaho potatoes, cut into small cubes (clean and dried)
1 cup chicken broth added to 1 cup water (you may not need all of this liquid)
salt/pepper
Cajun seasoning (I like Tony Chachere's)
oil
fresh parsley or sliced green onions for garnish

Brown sausage in a large pot (with a tight fitting lid).  Make sure some sticks to the bottom of the pot.  This is called "gratin".  It gives the dish great flavor!  Remove sausage and set aside.

Here's what the "gratin" on the bottom of the pot should look like:


Add a little oil and saute the onion, celery and bell pepper until cooked down and brown like this:


Add a little of the broth/water mixture to the pot and quickly put the lid on to steam for a few minutes.  Remove the lid and, using a wooden spoon, scrape the bottom the the pot.  This will help lift the "gratin".  Remove the sauteed vegetables and set aside.  Add a little more oil and turn up the heat to medium-high.  Fry the potatoes (make sure they are dry!) until a little brown on the edges like this:


Season well with salt/pepper/Cajun seasoning.  Add sausage and sauteed vegetables back to the pot.  Stir well.  Add some more of the broth/water mixture, then quickly put the lid back on to smother the potatoes.  Let smother for a few minutes, then remove the lid and stir.  Repeat this process until the potatoes are soft and cooked through.  You may not use all of the broth/water.  Check for seasoning, adding more if desired.  Garnish with fresh parsley or sliced green onions.

Here's what the finished dish looks like:


Delicious!


The next recipe is one I saw on a t.v. show and had to try.  I love potatoes au gratin, but I used to make it with a boxed mix (for shame!).  Not anymore!  I thought it was such a hard thing to make, but it's so not!  It's super easy, but it does takes time in the oven.  If you've got the time, make this!  It's so yummy!

POTATOES AU GRATIN

1 TBS butter, softened
4 large Idaho potatoes, clean and dry
1 cup heavy cream
1 cup milk (you can use all milk, but the cream makes it incredibly good)
1/8 cup all-purpose flour
1 tsp salt
pepper to taste
1 cup shredded cheddar cheese
1 green onion, sliced

Preheat oven to 400 degrees.  Butter a 9x13 baking dish with the softened butter.  Slice potatoes into 1/4 inch slices or dice them, whichever you prefer.  I sliced them.  Place potatoes in the buttered dish.  In a bowl, combine cream, milk, flour, salt, and pepper(as much as you like).  Whisk together well.  Pour this over the potatoes.  Cover the dish with foil and bake for 30 minutes.  Remove the foil and bake another 15-20 minutes.  Remove from oven and sprinkle cheese on top.  It will melt from the heat of the dish.  Then sprinkle the green onions on top.  Done!  See, I told ya it was easy.  Pretty, too.


So, there are a couple of my favorite potato recipes.  Embrace your inner Irish (or Cajun/Irish) and eat some potatoes!

Wednesday, May 8, 2013

Classic Lemon Squares

I love anything made with lemon!  It's so bright and tart.  Yum!  I must get it from my Mama because she loves all things lemon, too.  When she came over the other day we decided to bake something together.  So, of course, it had to be something made with lemons.  We chose the old-fashioned favorite, Classic Lemon Squares.  These are great because I usually have all of the ingredients on hand.  No special trip to the grocery store required.   They go great with a cup of tea, too!  Maybe you could make these for your Mama on Mother's Day this Sunday, along with a nice cup of tea?  Here's how my Mama and I did it:


CLASSIC LEMON SQUARES

1 cup + 2 TBS flour, divided
1/4 cup powdered sugar
1 stick butter, softened
2 eggs
3/4 cup granulated sugar
1/4 cup freshly squeezed lemon juice
1/2 TBS lemon zest

Preheat oven to 350 degrees.  Mix 1 cup of the flour and powdered sugar together.  Cut in the butter.  Mix until it resembles pie dough.


Press the dough into an 8 inch square baking dish.


Bake at 350 degrees for 15-20 minutes or until golden brown.


Beat together eggs, granulated sugar, 2 TBS flour, lemon juice and lemon zest for at least 1 minute (use an electric mixer).  Pour the mixture over the baked crust (it will be thin, that's ok).


Bake another 20-25 minutes, or until the lemon topping has set.


Let it cool, then sprinkle with powdered sugar.


Cut into small squares.


These are sweet and tart, so good!  Keep leftover squares in the refrigerator.

*Tip about zesting a lemon:  Use a small grater and only take off the yellow part of the rind.  The white part is bitter, you don't want that.

*Tip about juicing a lemon:  Roll the lemon on the counter before you cut it and juice it.  That will brake up the juice sacks and you'll get more lemon juice when you squeeze it.

Happy Mother's Day to all you mothers out there!  Enjoy your day (and maybe a lemon square or two)!

Thursday, May 2, 2013

Won Ton Wrapper Cups!

This is such a cute idea!  I saw it on a cooking show and had to try it.  You use won ton wrappers to make little crispy cups that you can fill with almost anything.  Chicken salad, tuna salad, taco fixings, fried rice, etc.  They are perfect for party appetizers because you can make them ahead of time then just fill them at the last minute.  Plus, they are really easy to make.  Here's how you do it:

WON TON WRAPPER CUPS

won ton wrappers
cooking spray

Preheat oven to 375 degrees.  Spray a mini muffin tin with cooking spray.  Place one won ton wrapper into each cup of the mini muffin tin.  Push down to form a cup.  Spritz a little cooking spray on top of the cups.


Bake in preheated 375 degree oven for 5 minutes or until light brown and crispy.  Be careful not to burn them!


Fill them with whatever you like.  I used them for taco shells and made little taco appetizers.  I filled half with seasoned ground beef and half with seasoned black beans (I just added a little taco seasoning to a can of black beans).  Then, I sprinkled on shredded cheese, tomatoes, green onions, etc.  My kids loved these!


You could also season the cups.  After you spritz them with cooking spray (before you bake them) just season them with salt and pepper or taco seasoning or Italian seasoning, etc.  Use whatever compliments your filling.

For a sweet variation:  Sprinkle them with cinnamon sugar before baking.  When done, fill them with warmed apple pie filling and whipped cream!

As you can see, the possibilities are endless.  That's why I love this idea.  Hope you do, too!

*Note:  If you have trouble finding won ton wrappers, try the produce section of the grocery store.  They have to stay refrigerated so a lot of stores keep them there.


Tuesday, April 23, 2013

Corn Souffle

With Spring here and Summer right around the corner, you will probably be invited to lots of get-togethers.  Crawfish boils, potlucks, church suppers, backyard parties and barbeques abound this time of year.  With good weather comes good times.  So, I thought I'd blog about a dish you can take to your next outing.  Not only is it delicious, it's also versatile and perfectly portable.

I tore this recipe out of a magazine a few years ago but never made it.  I forgot about it, really.  But, I ran across it recently and figured I'd give it a try.  Glad I did!  It was so good!  And don't let the name fool you.  You don't need a souffle dish to make it.

CORN SOUFFLE

2 TBS butter
1 (8oz) package cream cheese, cubed
1 can whole kernel corn, drained
1 can cream corn
1 (8.5oz) package corn muffin mix (I used Jiffy)
2 eggs, beaten
1 cup shredded cheddar

Preheat oven to 350 degrees.  In a big microwave-safe bowl, microwave the butter to melt (about 30 seconds or so).  Add cubed cream cheese and continue to microwave 15-30 more seconds or until the cream cheese is soft.  Stir until well blended.  Add drained whole kernel corn, cream corn, muffin mix and beaten eggs.  Mix well.  Pour into a greased 9x13 baking dish.  Sprinkle cheese on top.


Bake 40 minutes.  Cool slightly before serving.


If you are bringing this to a potluck, cover with foil after cooling slightly.  Cut into squares to serve.


This dish is always popular because just about everyone loves corn.  It's sweet and savory.  Delicious!

A spicier variation:  Use a can of Mexican Corn in place of the regular corn and replace the cheddar with pepper jack cheese.  You could even add some diced jalapeno if you like it extra spicy!

So, the next time you have to bring a dish to a party, give this one a try.  It won't disappoint.

Monday, April 15, 2013

Pina Colada Cake - A Vacation On A Plate!

When I need a little break but can't take a vacation, I like to make an exotic dish.  It makes me feel like I'm travelling, without leaving my kitchen.  One example is this Pina Colada Cake.  When you take a bite, you'll feel like you're sitting on a beach with a cocktail in your hand.

The great thing about this cake is that it only has 3 ingredients!  The icing is pretty easy, too.


PINA COLADA CAKE

Cake:

1 box yellow cake mix (disregard the directions on the box)
1 (20 oz) can crushed pineapple packed in juice
3 eggs

Icing:

1 (8 oz) tub Cool Whip, thawed
1/4 cup vanilla flavored yogurt

Garnish:

1 cup shredded coconut, toasted
1/2 cup pecans, toasted and chopped (optional)

Preheat oven to 350 degrees.  Grease and flour a Bundt pan (or you can use a 9x13 pan or two 9-inch round cake pans).  Shake out any excess flour.


In a large bowl, mix cake mix, eggs and crushed pineapple (including juice) by hand until blended.  Then, mix with an electric mixture on medium speed for 2 minutes.


Pour into prepared pan.


Bake at 350 degrees for 45-50 minutes (for Bundt pan.  Bake about 30-35 minutes in 9x13 pan or 25-30 in round cake pans).  Or until golden and toothpick comes out clean.  Let cool 10 minutes in the pan before turning out.  Let cool completely.


Brush off any excess flour left on the cake.


Meanwhile, toast coconut in a dry skillet over medium heat, stirring, until golden.


Wipe out the skillet, then toast the pecans for a few minutes.  Cool, then finely chop.


Icing:

Mix thawed Cool Whip and vanilla yogurt to blend thoroughly.  (Optional:  Add 1 tsp Rum Extract to icing)


Frost cooled cake.


Sprinkle toasted coconut, then chopped pecans on top of cake.


Refrigerate leftover cake.

So, there you have it, Pina Colada Cake.  Easy, pretty, and delicious!  The next time you need a little escape, make this cake.  It's like a vacation on a plate.

Thursday, April 4, 2013

Baseball, Hot Dogs, Apple Pie!

Baseball, hot dogs, apple pie...what's more American than that?  Major League Baseball Opening Day is like a holiday in our house.  We've waited all winter and finally, baseball is back!  You must understand, we are a baseball family.  My husband played in college, my son plays on a travel team, which my husband coaches, and my daughter used to play on an all-boys team when she was a little girl.  We never miss a New York Yankees game on T.V.  We even DVR the games if we're not home.  Some might say "obsessed".  I say "Passionate"!

But, to understand why we love Yankees Baseball so much you need the whole story.  My father-in-law, Sal Durante, was at a Yankee game with his girlfriend (at the time, now his wife) on October 1, 1961.  Yankee Roger Maris was on the brink of breaking Babe Ruth's single-season home run record.  He was tied with the Babe at 60.  In the 4th inning, Maris hit his 61st home run, breaking the record.  My father-in-law caught that ball.  He became a celebrity in New York and around the country.  He tried to give the ball back to Roger Maris, but Mr. Maris told him to keep the ball, sell it and make some money.  He sold it for $5,000.00 and used the money to marry my mother-in-law.  They've been together ever since, over 50 years!  Even though the record has since been broken by Mark McGwire and then Barry Bonds, many people feel, due to the steroid accusations, that Roger Maris is the true record holder.  My father-in-law still gets calls to do interviews and autograph signings.  He was even portrayed in the HBO movie *61.  People are still interested in his story all these years later.

Here's a photo of Roger Maris and my father-in-law, Sal Durante:


So, you can see why Yankee Baseball runs in the family.

When you think of baseball, you think of hot dogs.  So here's a recipe for chili that goes great on a dog and you don't need one of those packets of chili seasoning.  I'll tell you how to make your own packet.

MAKE YOUR OWN CHILI SEASONING PACKET

1 TBS flour
1 tsp onion powder
1 1/2 tsp chili powder
1 tsp salt
1/2 tsp red pepper flakes
1/2 tsp garlic powder
1/2 tsp sugar
1/2 tsp cumin

Mix everything together.  This equals 1 packet that you would buy at the store.


To prepare chili:

Brown 1 lb ground beef and drain off fat.  Add 1 can diced tomatoes, 1 can red kidney beans, 1/4 cup water, and the seasoning mix.  Bring to a boil, then reduce heat and simmer for 30 minutes.  Salt and pepper to taste.
*Add a little hot sauce for extra heat, if desired.

Tip:  Sometimes I use leftover red beans that I've cooked instead of canned beans.  Also, if you have picky eaters who don't like beans, zip them in the food processor until smooth.  That way you can't see the beans but you can still use them to thicken the chili.


Another use for this chili (that reminds me of baseball):  Make a Frito Pie!  If you're from the South, you know what I'm talking about.  If not, a Frito Pie is something you get from the concession stand at the ballpark.  They take a small bag of Fritos and cut it open along the side (lengthwise) and pour in chili.  They give it to you just like that!  Grab a fork and start eating!  It was my favorite thing to get at the ballpark when I was a little girl.  If you want to gild the lily, you can throw some shredded cheddar on top.  Try it.  Trust me.


Here's an easy way to make apple pie.  It kind of tastes like a McDonald's pie.

APPLE PIE-LETS

won ton wrappers (2 for each pie)
canned apple pie filling
melted butter
cinnamon
sugar

Preheat oven to 350 degrees.  Mix 1/4 cup sugar with 1 TBS cinnamon and set aside.  Pour pie filling into a bowl.  Chop the apples into small pieces and stir in a teaspoon of cinnamon.  Place a small spoonful (about a Tablespoon) of filling in the center of the wrapper.  Wet the edges of the wrapper with water using your fingertip.  Top with another wrapper and press the air out.  Seal edges by pressing with a fork all the way around.  Brush the top with melted butter and sprinkle with the cinnamon sugar mixture.  Place pies on a cookie sheet.  Bake at 350 degrees for 13-15 minutes or until golden.  Let cool a bit before eating.

*Sorry no pic on the pie-lets!  My camera batteries died.  I'll add in a pic soon.  Thanks!

So, I hope you make these recipes and watch some baseball.  You don't have to root for the Yankees (just don't root for the Red Sox.)  Enjoy!


Saturday, March 30, 2013

Easter Crispy Treats

Happy Easter everyone!  I hope you are enjoying this Easter weekend.  I have been having fun today making cute Easter treats.  Using a Rice Krispie treat recipe as a starting point, I made two super-cute Easter treats for the kids (and me, who am I kidding?  I love those things!)

Here's what I did:

EASTER CRISPY TREATS

1/2 stick butter
4 cups mini marshmallows
5 cups crispy rice cereal
food coloring
jelly beans

Heat a large pot on medium-low heat.  Add butter and stir until melted.  Add marshmallows and stir until melted.


 Once melted, stir in about 5 drops of food coloring.  I used blue.  It's hard to tell from the pictures, but it came out a nice pastel blue color.  Once the food coloring is thoroughly mixed in, add the cereal and stir well.  This takes a little elbow grease, but it needs to be completely mixed together.


 Spray a jelly roll pan (or large cookie sheet with sides) with cooking spray or grease it with butter.  Press the cereal mixture into the pan.  I wet my hands before I do this and it keeps it from sticking to me.  Make sure the mixture is pressed out flat and even.


Use an egg-shaped cookie cutter to cut out the treats.  The amount you can make depends on the size of your cutter.  Mine made 14.


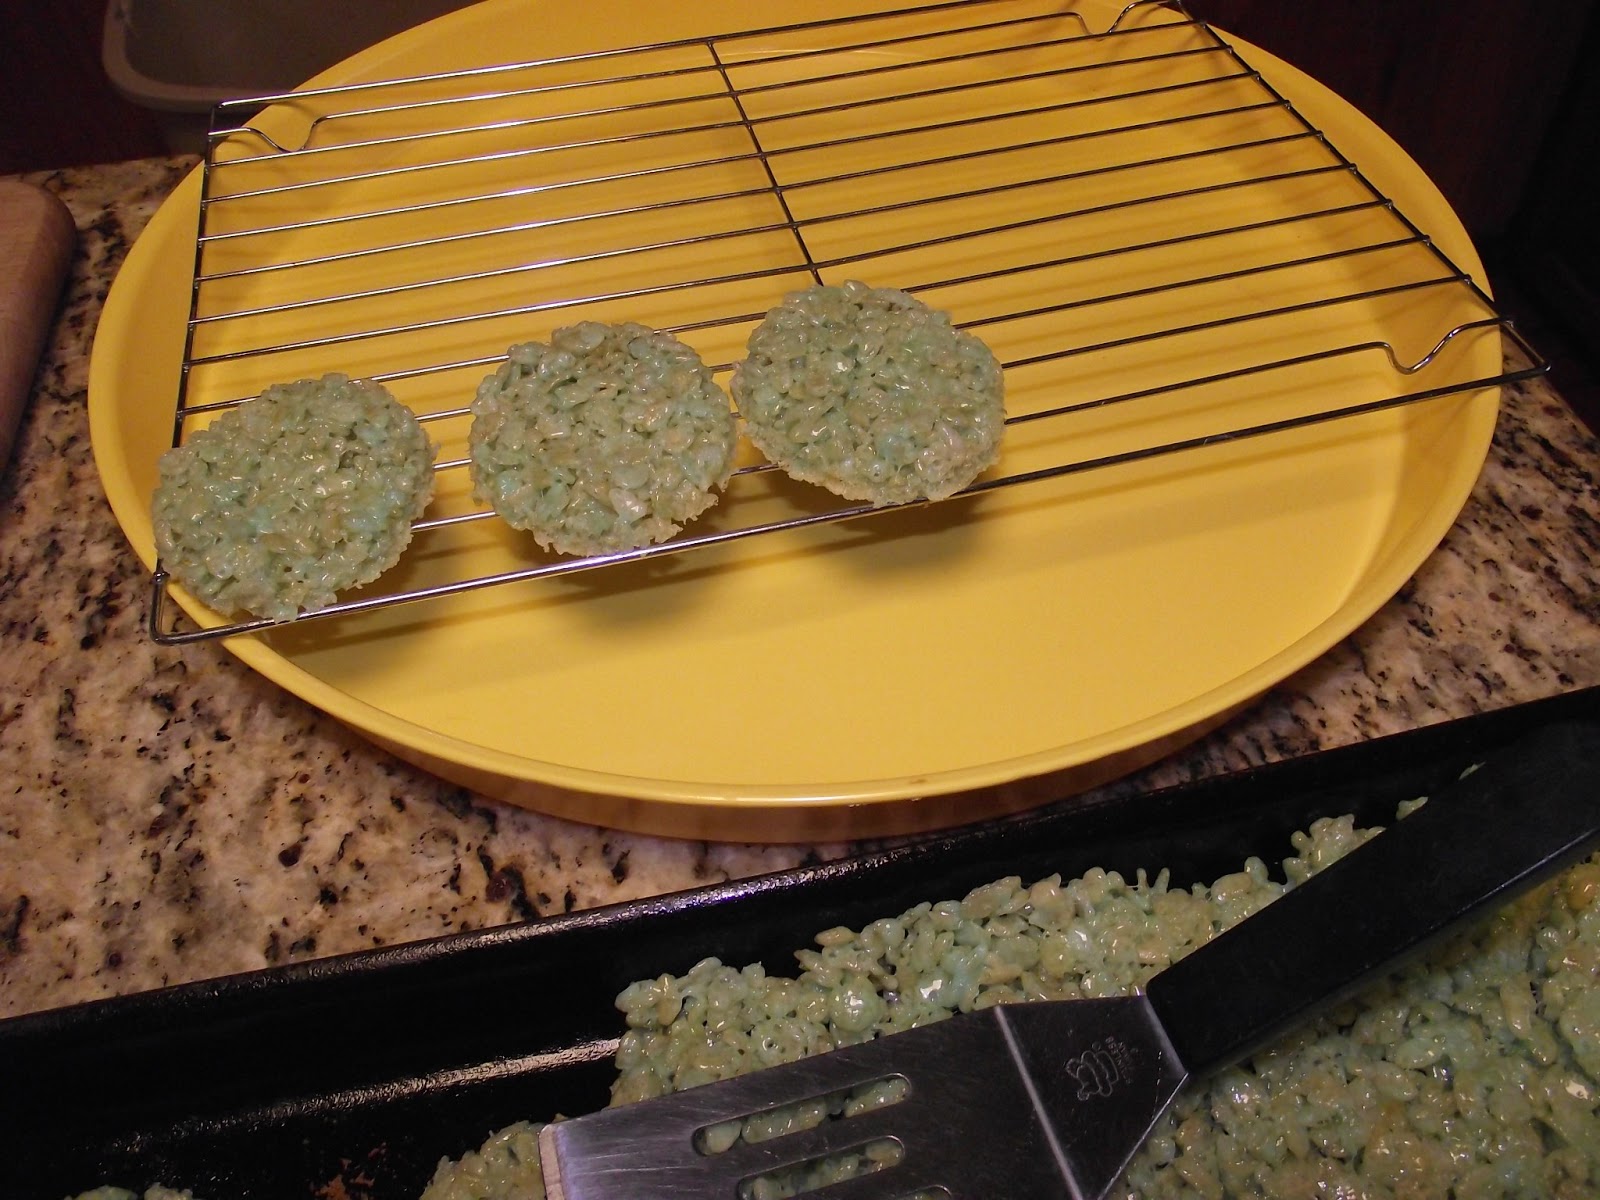
Remove to a rack or platter using a small spatula to help.


Keep the scraps after you've cut them out because we are going to use them to make another treat.

You can decorate them anyway you want.  If you have icing, use that.  I didn't, so here's what I did:

Put some food coloring into the compartments of a clean egg carton (I washed it out with soap and water).


Using a toothpick, paint the eggs with the coloring.


Fun to do with the kids, but be careful.  It will stain!

Now, for the scraps we saved.  Take a small amount and using your thumb, press it into the shape of a bird's nest.


Put 3 jelly beans into the nest for eggs.


A cute, easy treat that any kid would love and we used the scraps to make it.  I love that!

Three of these nests fit perfectly in a snack-size zip bag.  A great way to package them so you can add them to an Easter basket.

  
Happy Easter!