Monday, July 22, 2013

Pasta with Roasted Tomato Sauce (Yes, I roasted them myself)

Roasting tomatoes yourself?  I always thought that was something only chefs did.  It has to be complicated, right?  Wrong!  It is so ridiculously easy and it brings out so much flavor!  You won't believe how delicious a tomato can be until you roast it in the oven.  Not to mention onions and, of course, garlic.  Roasted garlic is like little nuggets of gold.  Crazy good!  It's so mellow and nutty, not sharp or bitter at all.  I could just spread it on crackers and eat it, as is.  Fantastic!  O.K., can you tell I'm excited about this?  Well, it's like discovering a hidden gem in cooking.  It just takes some time, but nearly no effort, to transform your veggies into a spectacular sauce.  Your pasta never had it so good.

Here's what I did:

Let me start by saying you can roast any kind of vegetable.  I just chose these because it's what I had on hand.  But, feel free to throw in some zucchini or eggplant, whatever you've got.

CHICKEN AND PASTA WITH ROASTED TOMATO SAUCE

2 boneless, skinless chicken breasts, cubed
1 box penne pasta (any cut will do)
salt/pepper
dried oregano and basil
6 Roma tomatoes
1 medium onion
3 cloves garlic (leave skins on the garlic)
Parmesan cheese
1/4 cup water
olive oil (or canola or vegetable oil)

Preheat oven to 275 degrees.  Cut tomatoes in half lengthwise.  Leaving root end in tact (this keeps it from falling apart), cut onion into quarters.  Leave garlic cloves in their skin (don't peel them).  Place all veggies on a cookie sheet (with sides).  Drizzle oil over them (not too much - just enough to coat them lightly).  Season with salt/pepper.  Rub them so they are evenly coated.  Lay tomatoes cut side down.  


Roast the veggies in the oven for 2 hours, turning the tomatoes over after 1 hour.  This is what they look like when done:


*This can be done ahead of time and refrigerated until needed.

After veggies are done, cook pasta.  Meanwhile, season cubed chicken with salt/pepper, oregano and basil.  Brown the chicken in a little oil in a big skillet or pot.  Remove chicken and drain any fat from skillet.  

Remove skins from garlic.  Place garlic, onions and tomatoes in a blender or food processor.  Puree to make a sauce.  Pour sauce into skillet.  Add 1/4 cup of water.  Return chicken and bring to a simmer.  Let cook for 5-10 minutes.  Season to taste.  When pasta is done, drain and add to the skillet.  Stir to coat the pasta with the sauce.  Sprinkle with Parmesan cheese before serving.


You won't believe what a difference roasting makes!  This sauce is fantastic!

You don't have to use chicken.  You could use Italian sausage or meatballs or sauteed eggplant or just go plain sauce with cheese.  You can use it for pizza, calzones, lasagna or as a dipping sauce for bread sticks.  Anyway you make it, you'll love it.  

So, hit the produce market and get yourself some tomatoes.  They are down-right cheap in the summertime!  You can make a ton of this sauce for almost nothing.  I suggest making a lot when you do.  If you're gonna take the time to do it, you might as well have some extra to freeze.  Just let it cool down, then put it in freezer bags or freezer containers and pop it into the freezer.  Then, just thaw it when you need it.  It is leaps and bounds above anything you get in a jar!  And, as you can see, almost as easy. 

Wednesday, July 17, 2013

"French" Vanilla Caramel Cake

My elementary school required french class from first through eighth grade.  It was an everyday class, just like math or science.  Over the years I had some interesting teachers, to say the least.  One of my favorite french teachers was Ms. Claude.  She was young and fun and dressed really cool.  She made us this cake (without the caramel) and brought it to class.  I asked her for the recipe because I loved it so much and had never heard of a cake made with yogurt.  I called it "French" Cake, because it came from my french teacher.  My Mama and I had made this a few times throughout the years.  But, I had forgotten about it until recently.  I don't know what made me think of it, but I decided to hunt for the recipe.  A big job considering my vast collection of recipes and lack of organizational skills!  Sure enough, I found it and made it.  It was good, but needed frosting.  I had been wanting to try to make my own caramel in the crockpot using condensed milk (saw it on Pinterest).  So, I put the two together for this recipe.  It was delicious!  Very sweet and rich and so moist!

Here's how I did it:

"FRENCH" VANILLA CARAMEL CAKE

1 cup plain yogurt
3 cups sugar (it was very sweet - you may want to lessen the sugar)
2 1/2 cups flour
1 cup oil
4 eggs, separated
1 tsp pure vanilla extract
1 can condensed milk

First, you need to make the caramel.  This can be done in advance and kept in the fridge.  Remove the label from the can of condensed milk.  Place the can (unopened) in crockpot.  Pour in enough water to cover the can completely.


Put the lid on the crockpot and cook on low 8 hours.  Remove the can (use tongs - the water's hot).  Let sit to come to room temp.  (If you make it ahead and refrigerate it, let it come to room temp before icing cake)
This is what it looks like when done:  (this is also excellent over ice cream!)


To make the cake:
Preheat oven to 350 degrees.
Mix yogurt, sugar, flour, oil, vanilla, and egg yolks together until well blended.


In a separate bowl, beat egg whites until frothy and soft peaks form.


Gently fold the egg whites into the batter.  Pour into a greased 9x13 baking dish.  Bake at 350 degrees for 30-45 minutes until a toothpick inserted comes out clean.
Poke holes in the cake with a chopstick or skewer while still warm.


Then, spread the caramel you made over the cake.  It will fall into the holes filling the cake with caramel.


Spread more of the caramel over the cake (as much as desired).


Cool a bit before cutting and serving.
Here's what the inside looks like:


It takes some time to make the caramel, but almost no effort.  So worth the time!  I hope you give this "French" Cake a try.  It's so sweet and delicious.  Ca cest bon! (It's so good!)  Merci (Thanks) and Au Revoir (Goodbye).  That concludes the French lesson for today.

Thursday, July 4, 2013

Summer Favorites!

Summer is such a great time of year!  The days are longer, the kids are out of school, it's a scorching 98 degrees with 99% humidity (oh, that's just here in Louisiana).  Ridiculous weather aside, I love the summertime.  We go in the pool, play lots of games, have people over more.  I can let the kids stay up later and sleep in a little longer (which equals less fighting!).  It's just fun!

I try not to heat up my kitchen if I can avoid it (can you blame me - see above weather statement).  So, I use my grill when at all possible.  I even use it as an oven.  I grill pizzas, french fries, baked beans.  Anything I would bake, I just regulate the grill to that temperature and use it instead.  It beats heating up the house and makes clean up easier, too.  (who wants to clean when you can lounge by the pool instead?)

Here are a few of my summertime favorites:

ITALIAN SAUSAGE & PEPPERS

1 lb. sweet or mild (or hot, if you like it) Italian Sausage links
1 green bell pepper, sliced
1 red bell pepper, sliced
1 onion, sliced
oil
salt/pepper
poboy rolls (or hot dog buns)

Place sliced peppers and onion in a baking dish that you can use on the grill (I like to use the aluminum disposable ones to make life easy, but if I don't have one I use an oven-proof skillet or Pyrex baking dish).  Drizzle a little oil on them (just enough to coat - don't drown them).  Season with salt and pepper to taste.  Cover with foil and put on the grill (preheated to medium).  Let them grill until softened, stirring occasionally.
Meanwhile, grill the sausages until browned on both sides (they don't have to be cooked through at this stage).
When peppers and onions are soft and sausages are browned, add the sausages to the pan with the peppers and onions.  Recover with foil and let steam together for 5-10 minutes on the grill, until sausages are cooked through.  (I shake the pan every now and then to prevent the bottom from burning).  Remove from grill and let it rest for a few minutes before serving.  Serve on buns.


Another summertime favorite of mine is pico de gallo.  This is just a simple salsa (very simple), but so delicious.  It's all about the tomatoes and they are so fresh and ripe in the summer.  Perfect!

PICO DE GALLO

3 large ripe tomatoes (creole tomatoes, if you can get them, are perfect)
1 small red onion
cilantro
salt/pepper

Dice the tomatoes and onion and put in a bowl.  Add some chopped cilantro (I like a lot, some people don't, so add as much or as little as you like).  Season to taste with salt and pepper.  That's it.  I told you it was easy.  I like to let it sit in the fridge for a while before I serve it with chips.  It also goes great on a hamburger.  I love it on my black bean burgers - recipe here:  http://hotsouthernmessblog.blogspot.com/2012/07/meatless-is-not-four-letter-word.html


Of course, I have to share a summertime dessert.  This is a fun ice cream cake that's made with ice cream sandwiches.  Your kids will love to help you make this one.  And the best part, no baking and heating up the house! (Are you sensing a theme here?)  Plus it's a freezer cake, so it'll cool you down on a hot summer day!

Just be sure to work quickly when making this one or the ice cream sandwiches will start to melt!

ICE CREAM SANDWICH CAKE

12 ice cream sandwiches
1 (8oz) tub cool whip, thawed, divided
1/2 cup fudge ice cream topping, warmed
1 box instant chocolate pudding mix

Put the fudge ice cream topping in a big bowl (microwave-proof).  Warm it a little in the microwave (just to soften).  Add 1 cup of the thawed cool whip and whisk until blended.  Add the pudding mix and stir well (for 2 minutes) until well blended.  It will be thick.  If it is too thick to spread, you can add a little milk to thin it out.  You want it to be the consistency of frosting.  Set aside.


Get a long piece of foil (24x12 inches or so).  Arrange 4 of the ice cream sandwiches, side by side, on the foil.


Spread half of the pudding mixture on top of them.


Layer 4 more ice cream sandwiches on top, then the other half of the pudding mixture.  Finally, top with the last 4 ice cream sandwiches.

Frost the top and sides with the remaining cool whip.


Bring up the foil and double fold the top and sides to loosely seal the packet.


Freeze at least 4 hours (or overnight).  Let sit at room temperature to soften a little bit before slicing.


It has a pretty striped affect when you slice it!  And it is so good!

So, there are a few of my summertime favorites.  Try them out when you want to keep your kitchen (and yourself) cool.  Enjoy!


Saturday, June 22, 2013

Sesame Chicken and Roasted Broccoli

As stated in previous posts, like this one:

http://hotsouthernmessblog.blogspot.com/2012/07/chinese-food-at-home.html    

I only like Chinese food if I make it myself.  I like being able to control the ingredients in my food.  This is a recipe I did not include in the previous post on Chinese food so I thought I'd share it.  My recipe for Sesame Chicken is really good and easy.  Plus, I "oven-fry" the chicken so it's a little bit better for you.  Also, I'll share how I get my family to eat broccoli!  You heard me right, they eat broccoli.

SESAME CHICKEN

Chicken:
2 boneless chicken breasts, cubed
1 egg
1 cup corn flake crumbs (zip in food processor or smash in a zip bag)
season salt
flour

Preheat oven to 400 degrees.  Line a plate with flour.  Line a second plate with corn flake crumbs seasoned with season salt.  Crack the egg into a bowl add a little bit of water (about a tablespoon or so) and beat.  Dredge cubed chicken in flour, then egg wash, then seasoned corn flake crumbs.  When they are all coated, place them on a cookie sheet and bake in the preheated 400 degree oven for 5 minutes.  Flip them over then bake for 5 minutes more.  Meanwhile, make the sauce.

Sauce:
1/2 cup brown sugar
2 TBS cornstarch
1 cup chicken broth
1/2 cup water
2 TBS apple cider vinegar (or white vinegar)
2 TBS low-sodium soy sauce
1 TBS sesame oil
1 TBS canola oil
1 tsp ketchup
1 tsp hot sauce
1/2 tsp red pepper flakes
1 clove garlic, minced
sesame seeds

In a saucepan, mix together sugar and cornstarch.  Stir in the chicken broth, water, vinegar, soy sauce, sesame oil, canola oil, ketchup, hot sauce, red pepper flakes and garlic.  Bring to a boil over medium heat, stirring constantly.  Reduce heat and simmer for 5 minutes.

When chicken is done, toss it with the sauce and sprinkle with sesame seeds (as much or little as you like).  Serve over hot rice.  Garnish with green onions, if desired.


Here is my secret for getting my family to eat broccoli.  Roast it!  That's it.  So simple, but it completely changes the taste.  Delicious!

ROASTED BROCCOLI

1 head broccoli, cleaned and cut into florets
oil
salt/pepper

Preheat oven to 400 degrees.  Place the broccoli on a cookie sheet and toss it with a little oil (a couple of tablespoons or so - not too much!)  Then season with salt and pepper to taste.  Stir it around to make sure it's evenly coated with oil and seasoning.  Put in the oven and roast for about 10-15 minutes or until edges are just starting to crisp up.


Who knew Chinese at home could be so quick, easy and healthy, too!  I hope you give these recipes a try.  And maybe you're picky eaters will like broccoli, too?  It could happen.

Tuesday, June 18, 2013

Make Middle Eastern Food at Home

My daughter and I love this restaurant called Albasha.  It specializes in Greek and Lebanese food.  We especially love the falafel and tzatziki sauce there.  We order it every time we go, which isn't often because my old-school Italian husband and pickiest-eater-ever son would sooner go hungry than try something new.  However, when she and I sneak away by ourselves, we choose Middle Eastern fare.  Because we go so rarely, I decided to try and make our favorite middle eastern food at home.  I'd been putting this off because I figured I'd have to go buy a bunch of weird ingredients or spices.  But, after a little research, I found that I could make these dishes with everyday ingredients I already had on hand.  Ya know what?  They came out great!  Here's how I did it:


FALAFEL 

1 can chickpeas, drained and rinsed
2 green onions, chopped
1 small clove garlic. coarsely chopped
1 tsp ground cumin
a pinch of red pepper flakes
2 TBS chopped parsley
2 TBS chopped cilantro (I was out of cilantro so I just used 4 TBS parsley)
1 egg
2 TBS lemon juice
a big pinch kosher salt
1 tsp baking powder
1/4 cup flour (plus more for forming patties)
Oil to fry them in

In a food processor, combine chickpeas, green onions, garlic, cumin, red pepper flakes, parsley, cilantro, egg, and lemon juice.  Pulse to combine.  Season with salt and pulse again.  Mixture should not be totally smooth; it should still have some chunks in it. Add in the baking powder and 1/4 cup flour and pulse just to combine.  Remove to a bowl and cover.  Chill in the refrigerator for 30 minutes.

 It will look light green.  That's from the parsley.

  
After chilling the dough, remove it from the fridge.  Meanwhile, put enough oil in a large skillet to reach halfway up the side.  Heat on medium-high heat until hot.  Here's how to tell if it's ready.  Throw a pinch of flour into the oil.  If it sizzles, it's ready.  

While the oil is heating, drop balls of the dough onto a plate of flour.  Roll the balls around in the flour and gently press to form patties.


Fry in batches (don't overcrowd the skillet) for about 3 minutes per side.  Drain on paper towels.


These are so flavorful!  Especially when dipped in the Tzatziki sauce.

TZATZIKI SAUCE

1 cup plain yogurt
1 cucumber, peeled, seeded and diced
1 TBS olive oil
2 TBS lemon juice
1 tsp dried dill
1 clove garlic (if yours are small, use 2)
salt/pepper to taste

In a blender, combine yogurt, cucumber, olive oil, lemon juice, dill and garlic.  Salt and pepper to taste.  Blend until well combined.  Transfer to a bowl, cover and refrigerate for at least 1 hour to let the flavors marry.


This sauce is not only a great dip for falafel or veggies, it makes a wonderful salad dressing!

So, I hope you give these Middle Eastern dishes a try.  As you can see, they're easy to make with ingredients you probably have on hand.  Enjoy!

Monday, June 10, 2013

I Cannot Tell a Lie. I Love Cherries!

Cherries remind me of summer.  I absolutely love eating fresh cherries when they are in season.  However, I can get that great cherry flavor year-round thanks to dried cherries and cherry preserves.  If you know how to use these two ingredients, you can make some delicious cherry recipes.  Here are a couple:

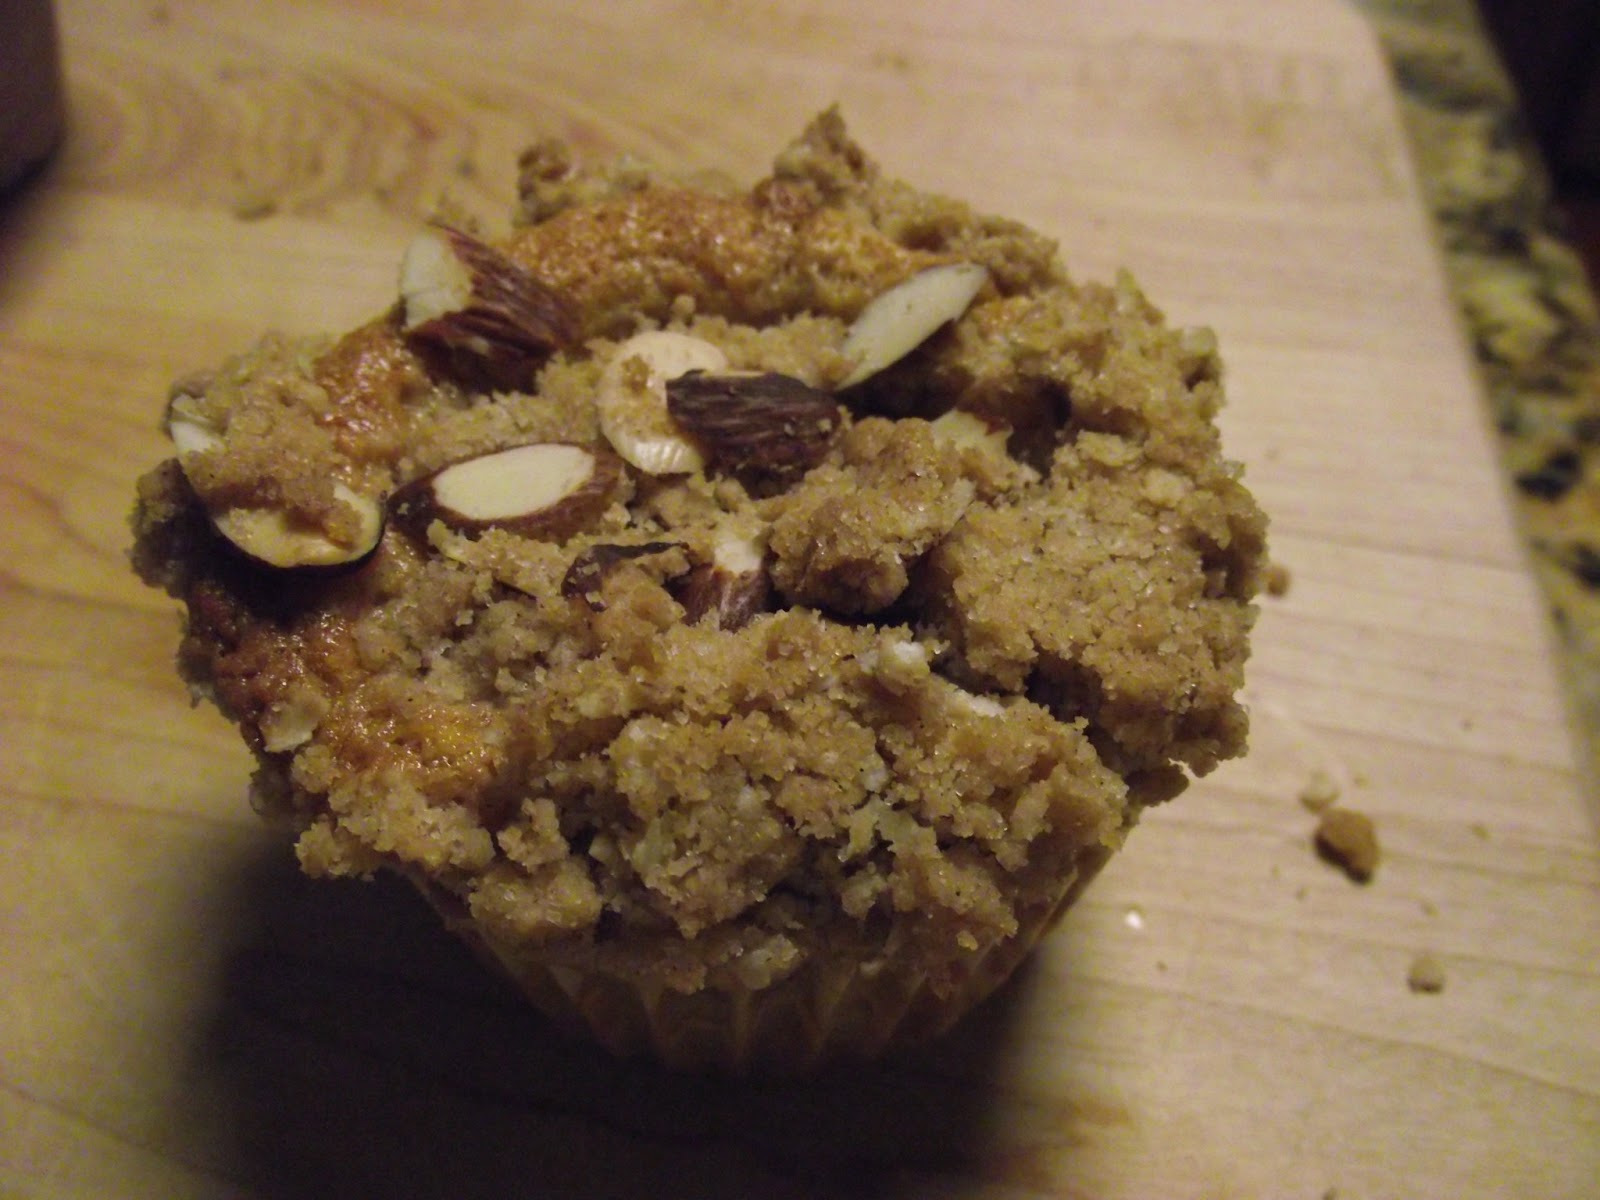
CHERRY ALMOND MUFFINS

Muffins:
1 box yellow cake mix
3 eggs
1/3 cup oil
1/2 tsp almond extract
1/2 cup cherry preserves

Topping:
1/4 cup oats
1/4 cup all-purpose flour
1/4 cup brown sugar
1/4 cup white sugar
1/2 tsp cinnamon
1/4 cup cold butter (cut butter into cubes & put on a plate in fridge to get cold)
1/4 cup slivered almonds

Preheat oven to 350 degrees.  Mix muffin ingredients together with mixer on medium speed until blended well.  Line a muffin tin with cupcake liners.  Fill cups about 2/3 full with batter.

In a separate bowl, mix oats, flour, both sugars, and cinnamon.  Cut in the cold butter with a fork or pastry blender.


Stir in almonds.  It should look like this:


Sprinkle a little of this topping over each muffin.


Bake for 20-25 minutes.


These are so good!  You can't even tell you started with a box of cake mix.  They are perfect for breakfast or brunch and even dessert.  And they look like they came from a bakery.  My husband asked where I bought them.  Pretty and Delicious!

The next recipe is one that I dreamed up one night when I couldn't sleep.  How pathetic right?  I'm laying there, trying to sleep, but instead I'm thinking about how to put cherries in a cookie.  But, for once, my insomnia paid off!  These cookies are phenomenal!  My family went crazy for these!


WHITE CHOCOLATE CHERRY PECAN COOKIES

1 stick unsalted butter, softened
1/2 cup white sugar
1/4 cup brown sugar
1 egg
1 tsp pure vanilla extract
1 cup all-purpose flour
1/2 tsp salt
1/2 tsp baking soda
1/2 cup white chocolate chips
1/2 cup dried cherries
1/2 cup finely chopped pecans

Preheat oven to 375 degrees (350 degrees if you're using a dark or non-stick cookie sheet).  Cream the butter, both sugars, egg and vanilla with a mixer until fluffy.  In a separate bowl, sift flour, soda and salt together.  Add the flour mixture to the butter mixture and stir until blended.  Gently stir in the white chocolate chips, cherries and pecans.  Drop from a teaspoon 2 inches apart (they will spread a little) onto an ungreased cookie sheet. Bake for 8 minutes or until the edges are light golden brown.  Cool a few minutes on the cookie sheet, then transfer to a rack and cool completely.  Store in an airtight container.


So, there are a couple of ways to get that great cherry flavor anytime you want it.  I hope you give these recipes a try.  If you are a cherry fan, they are a must!  Enjoy!

Saturday, June 1, 2013

Chocolate Toffee Squares

Did you ever have a Skor candy bar?  They are my favorite candy bar, hands-down!  Crispy toffee covered in chocolate, oh yeah.  Well, this easy recipe tastes a lot like that candy bar.  And you'll be surprised at the crazy ingredient in this one.


CHOCOLATE TOFFEE SQUARES

24 saltine crackers (yep, crackers)
1 stick butter
1/2 cup light brown sugar
1/2 cup (heaping) chocolate chips (semi-sweet or milk chocolate-your preference)

Preheat oven to 425 degrees.  Line a large cookie sheet (with sides) with foil.  Spray the foil with cooking spray.  Arrange the saltines salt-side down in a single layer.


In a small pot, melt the butter and brown sugar.  Boil until it turns a caramel color.  This does not take long, just a few minutes.


Pour this mixture over the crackers, covering them evenly (it will spread in the oven, but try to get all the crackers covered).


Bake for 3-5 minutes, or just until it starts to bubble (watch it carefully).  The toffee spreads all over but don't worry, that's why you use the foil and cooking spray.


Remove from the oven and sprinkle the chocolate chips over the top.  (I used mini chips, but regular-sized works, too)


Let them sit for a minute or two to get melty, then spread over the crackers with a butter knife or spatula.


Put the cookie sheet in the freezer for 15 minutes or so (until completely cold).  Break them apart into squares.  Enjoy! (store leftovers in the fridge)


If you like toffee, you'll like these.  These little goodies are crisp and sweet with a hint of saltiness.  They remind me so much of a Skor bar!  Hope you like them!